

Table of Contents
- Introduction
- Chapter 1: What is Internet Marketing in 2019-20 All About?
- Chapter 2: Optimizing Your Website For Search Engines In 2019-20
- Chapter 3: Creating Blog Posts That Attract Organic Traffic In 2019-20
- Chapter 4: How To Get Your YouTube Marketing Videos On The First Page Of Search Results In 2019-20
- Chapter 5: How To Compose Killer Social Media Marketing Posts In 2019-20
- Chapter 6: Amplifying Your Reach With A Paid Facebook Marketing Campaign In 2019-20
- Chapter 7: Generating Qualified Website Traffic With A Google Ads Campaign In 2019-20
- Chapter 8: How To Create A Powerful Email Marketing Campaign In 2019-20
- Chapter 9: Recovering Abandoning Visitors With Remarketing In 2019-20
- Chapter 10: Generating More Sales Leads On Autopilot With A Facebook Messenger Bot In 2019-20
- Chapter 11: How To Funnel More Qualified Leads And Referral Traffic To All Your Marketing Channels With A Giveaway
- Chapter 12: Building A Complete Internet Marketing Plan For 2019-20
- Chapter 13: Alternative Internet Marketing Methods That Make Instant Money In 2019-20
- Chapter 14: Internet Marketing Strategies For eCommerce Enthusiasts In 2019-20
- Chapter 15: Internet Marketing Best Practices In 2019-20
- Chapter 16: Advanced Internet Marketing Tips and Tricks That Work In 2019-20
- Chapter 17: Internet Marketing Do’s And Don’ts in 2019-20
- Chapter 18: Internet Marketing Premium Tools And Services To Consider in 2019-20
- Chapter 19: Internet Marketing Shocking Case Studies in 2019-20
- Chapter 20: Internet Marketing Frequently Asked Questions in 2019-20
- Conclusion
- Top Resources
Complete Internet Marketing Training Course
Introduction:

Welcome to the latest and very easy to apply “Internet Marketing” Training, designed to take you by the hand and walk you through the process of getting the most out of Internet Marketing in 2019-20, on behalf of your business.
I’m very excited to have you here, and I know that this will be very helpful for you.
This Exclusive Training Will Show You Step-By-Step, Topic By Topic, And Tool By Tool, What You Need To Know To Dominate Internet Marketing, In The Easiest Way Possible, Using The Most Effective Tools And In The Shortest Time Ever.
This Training Is Comprised Of 20 Chapters, Ready To Show You The Latest Internet Marketing Strategies Through 2019-20.
This Is Exactly What You Are Going To Learn:
Chapter 1: What is Internet Marketing in 2019-20 All About?
Chapter 2: Optimizing Your Website For Search Engines In 2019-20
Chapter 3: Creating Blog Posts That Attract Organic Traffic In 2019-20
Chapter 4: How To Get Your YouTube Marketing Videos On The First Page Of Search Results In 2019-20
Chapter 5: How To Compose Killer Social Media Marketing Posts In 2019-20
Chapter 6: Amplifying Your Reach With A Paid Facebook Marketing Campaign In 2019-20
Chapter 7: Generating Qualified Website Traffic With A Google Ads Campaign In 2019-20
Chapter 8: How To Create A Powerful Email Marketing Campaign In 2019-20
Chapter 9: Recovering Abandoning Visitors With Remarketing In 2019-20
Chapter 10: Generating More Sales Leads On Autopilot With A Facebook Messenger Bot In 2019-20
Chapter 11: How To Funnel More Qualified Leads And Referral Traffic To All Your Marketing Channels With A Giveaway
Chapter 12: Building A Complete Internet Marketing Plan For 2019-20
Chapter 13: Alternative Internet Marketing Methods That Make Instant Money In 2019-20
Chapter 14: Internet Marketing Strategies For eCommerce Enthusiasts In 2019-20
Chapter 15: Internet Marketing Best Practices In 2019-20
Chapter 16: Advanced Internet Marketing Tips and Tricks That Work In 2019-20
Chapter 17: Internet Marketing Do’s And Don’ts in 2019-20
Chapter 18: Internet Marketing Premium Tools And Services To Consider in 2019-20
Chapter 19: Internet Marketing Shocking Case Studies in 2019-20
Chapter 20: Internet Marketing Frequently Asked Questions in 2019-20
Well, It’s Time For You To Start Getting The Most Out Of Internet Marketing In 2019-20, On Behalf Of Your Business.
I know you’ll love this training.
Chapter 1: What is Complete Internet Marketing in 2019-20 All About?
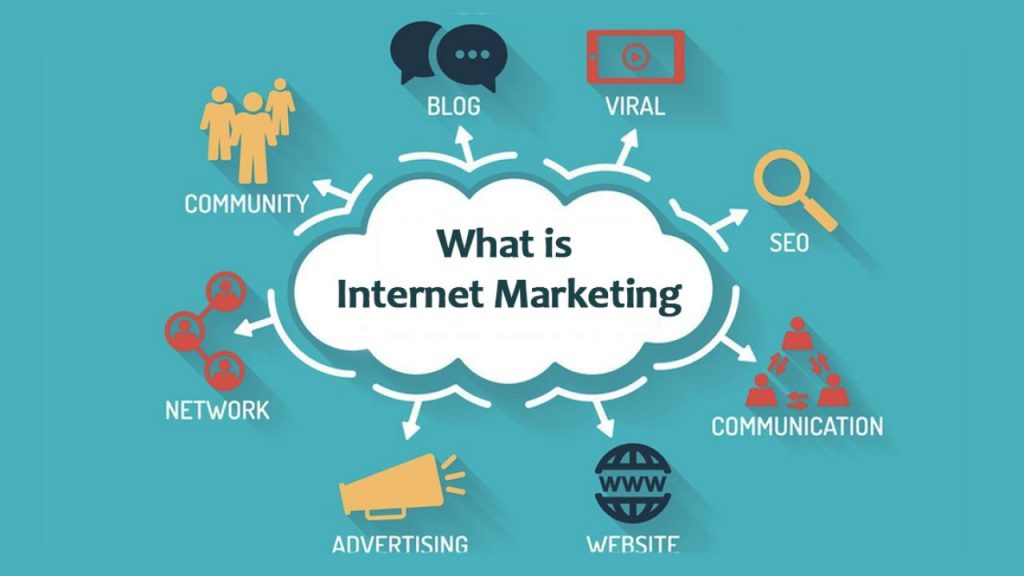
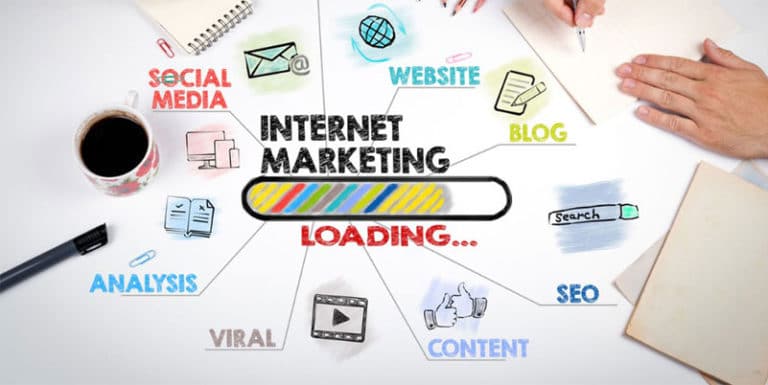
Internet marketing, also known as online marketing, is by definition the process of promoting a business or a brand and its associated products or services over the internet. The goal of internet marketing is to generate traffic, leads, and sales.
What people struggle with when trying to understand internet marketing is how to actually do internet marketing, and there are a lot of methods out there.
The most common forms of internet marketing include email marketing, online advertising, and search engine optimization. There also exist other, more indirect forms of internet marketing such as affiliate marketing, and more modern internet marketing formats, such as video marketing.
Usually, individuals and companies trying to promote a business or brand on the internet focus on one or two methods, but they are leaving a lot on the table.
Complete internet marketing, on the other hand, is the process of using all possible online marketing methods and strategies on a single campaign to generate the best results, fast.
Complete internet marketing allows you to get the most out of online marketing technology because it mixes the best of traditional internet marketing strategies with proven modern methods such as social media marketing.
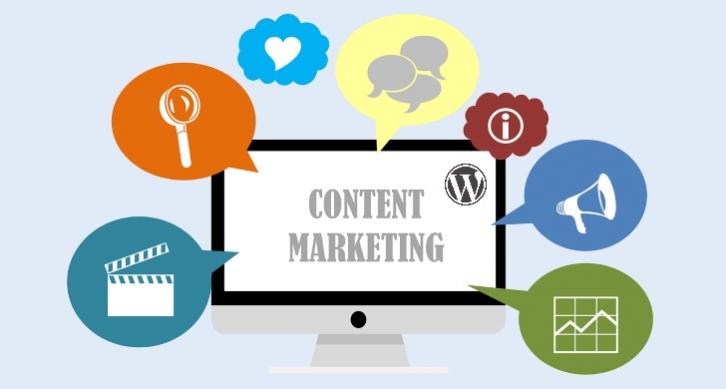
Complete internet marketing integrates heavily with content marketing, which is the use of online content to deliver value to potential customers. Because of this, with complete internet marketing you’ll be able to attract and capture the attention of potential customers on any of your marketing channels.
Having a complete internet marketing plan in 2019-20 is critical for the success of your business and there’s no way around it! Do you want your business to sit alone in obscurity and in a corner of your hometown, or do you want it to grow, to go international, and to stay relevant beyond 2019-20? Then you’ve picked the right course!
What Are The Benefits Of Complete Internet Marketing For Your Business In 2019-20?
91% of successful online businesses have adopted a complete internet marketing plan before 2019-20 and are expanding!
Complete internet marketing allows you to achieve specific business-focused goals such as increasing brand loyalty.
Complete internet marketing generates over three times more leads than traditional internet marketing.
Complete internet marketing can cost over 60% less than traditional internet marketing.
You can drive online sales 24 hours a day, 7 days a week!
So if you’re ready to transform the way you promote your business on the internet, head over to the next lesson!
Chapter 2: Optimizing Your Website For Search Engines In 2019-20
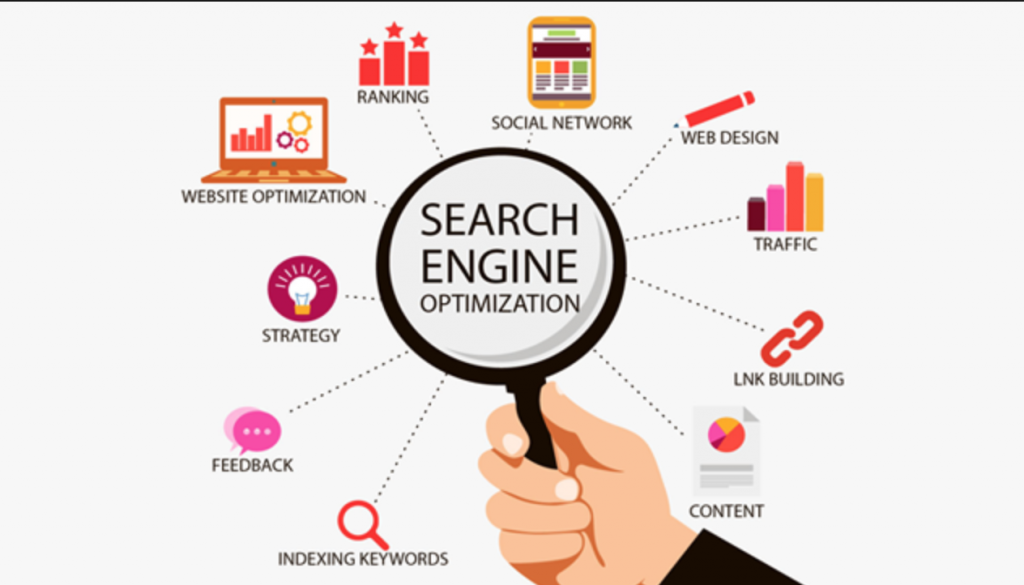
Hey there everyone! Complete internet marketing is all about enhancing your brand’s online presence so you can generate more traffic, leads, and sales, and it all starts by optimizing your website for search engines.
In this lesson we are going to show you how you can optimize an existing website from scratch. We’ll use WordPress as our content management system of choice because it allows us to make optimizations on the fly, without coding or website design experience required!
If you’re using WordPress, then you’ll be able to follow the steps in this lesson to the letter. But if you’re using a different system, you’ll simply have to apply the steps where they correspond!
Step 1 – Installing A Search Engine Optimization Plugin
You have to keep your on-site search engine optimizations in check. With WordPress, you can simply optimize and refine on-site SEO by installing a plugin. The best SEO plugin for WordPress websites is “Yoast SEO”.
To install the “Yoast SEO” plugin just move over the “plugins” tab on the left-hand menu and click on the “add new” option. Now type “Yoast SEO” in the search bar and wait for the results. Now locate “Yoast SEO” in the results and click on “install now”. Now click on “activate”.
You will be able to optimize your on-site SEO after installing this plugin by moving over the “Yoast SEO” tab on the left-hand menu and selecting an area that you’d like to optimize. The plugin scans your site for SEO errors and provides you with recommendations to fix them, saving you all the guesswork.
Step 2 – Add A Meta Description For Search Results
Now that you’ve installed “Yoast SEO”, you can use it to apply your first on-site SEO optimization, a meta description for all your pages. Adding a meta description will help you to increase search engine traffic to your site because meta descriptions help search users to know what your site is all about when your content pages appear in search results.
Move over the “Yoast SEO” tab and click on the “search appearance” option. Now click on the “taxonomies” tab and then on the “meta description” field to write your meta description.
Rules to write the best possible meta description include making sure to include your main target keyword in your meta description, including additional high-volume search terms in your niche, and including a call to action to invite search users to click on your link.
Your meta descriptions should be 155 characters or less, or they will look incomplete in search results. You can click on “save changes” after writing your meta description.
Step 3 – Install A Caching Plugin
Search engines like Google measure load speeds to determine a site’s ranking. One of the easiest ways to improve your site’s load speed is by installing a caching plugin. A caching plugin will create dynamic copies of your pages to avoid loading the entire content every time that a user enters a page on your site.
Our caching plugin pick is the “WP Super cache” plugin, the most popular and user-friendly caching plugin for WordPress.
To install the “WP Super cache” plugin just move over the “plugins” tab on the left-hand menu and click on the “add new” option. Now type “WP Super cache” in the “search plugins” bar, locate “WP Super cache” in the results and click on “install now”.
You can click on “activate” after it is installed. Now move over the “settings” tab on the left-hand menu and click on “WP Super cache”. Select the “caching on” option in the easy section and click on “update status”.
Step 4 – Optimize On-Site SEO In The Customizer
You can add some simple yet powerful SEO optimizations to your site’s structure to increase search traffic to your site. With WordPress, you can add these customizations with a few clicks of your mouse using the customizer.
Move over the “appearance” tab on the left-hand menu and click on “customize”. Once in the customizer, do this step by step.
Start by clicking on the “site identity” tab from the left-hand menu. Click on “select logo” to upload a logo to your site. Now click on “select file” to locate your image logo on your computer.
Double click on your logo to upload it. You can improve your site’s discoverability by inserting niche keywords in your image’s meta data.
You simply have to enter a long-tail keyword in your niche to the “title” and “alt text” fields in the “attachment details” section. We recommend you to enter the same keyword in both fields. You can click on “select” to continue after adding meta data to your logo.
Now enter the name of your site in the “site title” field. Now enter your site’s tagline in the “tagline field”. Your site’s tagline affects your ranking.
A good site’s tagline is simply a brief description of your site that includes your main target keywords, separated by comas. This will help search engine algorithms to better understand the topic of your site.
Now move over “site icon” and click on “select image” to add an icon to your site. Here you can use a simplified version of your logo. Don’t forget to optimize the “title” and “alt text” fields.
These are all on-site optimizations that you have to add using the customizer, so you can click on the “publish” button to finish and load them to your site. Now click on “close” to go back to the dashboard.
Step 5 – Install Share Buttons
It is crucial to add share buttons to your site. Share buttons give visitors and content readers an easy way to share your content with others, which generates qualified traffic. You can add share buttons to your WordPress site the easy way by installing a social share plugin.
Our top social share plugin pick is the “social pug” plugin. Move over the “plugins” tab on the left-hand menu and click on “add new”. Type “social pug” on the search bar. Now locate the “social pug” plugin in the results and click on the “install now” button. Now click on “activate”. With these simple steps, you’ve just added share buttons to all your content pages!
Step 6 – Activate Search Engine Visibility And “SEO” Friendly URLs
There are two additional SEO optimizations that you have to make sure are active on your WordPress website. First, move over the “settings” tab on the left-hand menu, and then click on “reading”. Find the “Search Engine Visibility” option and make sure that the box is unchecked. If it is checked, simply uncheck it and click on “save changes”.
Now click on the “Permalinks” option in the “settings” menu. Under “Common Settings”, select the “Post name” option and click on “save changes”. This option will allow you to include the keywords in your headlines of your URLs to increase your site’s ranking for those keywords in search results.
And this is it for now everyone! Next up we’ll be showing you how to compose blog posts that are optimized to generate traffic from everyone’s favorite search engines!
Chapter 3: Creating Blog Posts That Attract Organic Traffic In 2019-20
Blogging is one of the most important elements of complete internet marketing because it helps you to achieve several goals, such as attracting qualified organic traffic to your website, increasing your site’s authority, and improving exposure for your brand.
In this lesson we are going to show you how to create blog posts that will multiply traffic to your site, for free! If you’re using WordPress like us, start by moving over the “posts” tab on the left-hand menu, and then to click on “add new”.

Step 1 – Writing The Headline
Start by composing the post’s headline by clicking on the “add title” field. The function of a post’s headline is to grab the attention of users and to rank your site for the keywords that you target with it. We’ve discovered three elements that make a killer headline.
Number one is a numbered title. Internet users love list articles, and they’re easy to create. You simply have to divide the content in your post into numbered entries. For example, if you write a post about complete internet marketing tips, you can divide it into 10 different entries, each entry corresponding to a tip. The number of entries you got is the number you’ll add to the beginning of your headline. In this example, we have divided our post’s into 5 entries, so our headline will start at 5.
Number two, you have to add a long-tail keyword that includes a high-volume search term. With this trick you can rank your post on top of searches that target the keywords you include. It also helps users to identify your post in the results.
Number three, you have to add an actionable tease to your headline, such as a promise, or a command. The purpose of this text CTA is to make your readers curious, so even if there are 10 other different results targeting the same keywords, users will be more inclined to click on your post.
Step 2 – Building The Content
In this part of the lesson we are going to show you how to quickly structure a quality blog post. First, create an article that is long, between 2,000 and 3,000 words long. Search engine algorithms are programmed to give more relevance to long-form content. The explanation for this is that long-form content is elaborate and original.
As you can see, the word count in our article is a bit over 2,000 words long. Once you hit the recommended word count, you have to divide the content with numbered subheadings to make it into a list article, with separate entries.
The reason why readers love list articles is that long articles are easier to read when divided in entries. Readers get the sensation that they’re just reading short pieces, so they stay for longer on your content pages, increasing your site’s relevance and authority.
Step 3 – Optimizing Your Images
You can add images to your blog posts to achieve two goals: to make the content more visually appealing and to optimize the images for search. Besides, adding images in the middle of your content decreases the load of reading, which improves the user experience on your site.
The optimal way to add images to your content is to add a single image in the middle of each numbered entry. Let’s show you a quick example. First, separate text in an entry after the third or fifth paragraph by placing the cursor at the end of the paragraph and pressing the “enter” key on your keyboard.
Now click on the “add image” button. Now upload or select an image from the “media library”. Now enter a high-volume search term or keyword on the “title” and “alt text” fields. You can also add a comment about the image or about the entry into the “caption” field. Now click on “select”. Once an image is inserted into your content, center it by clicking on the “align center” button.
Step 4 – Adding Tags
Tags help search engines to recognize what topics are relevant to your site, ranking your content pages for searches for those topics.
Because of this, we recommend you to only use general niche keywords, phrases, and search terms that are relevant to your blog post as tags.
To add tags to your posts you will simply have to click on the “document” tab, to click on the “tags” tab, and then to enter your target keywords in the “add new tag” field. Remember to press the “enter” key each time that you enter a new tag.
Step 5 – Setting A Featured Image
You can set a feature image to your posts to increase visibility to image search results and to improve the visual presentation of your posts.
To add a feature image, click on the “featured image” tab under “document”, and then click on “set featured image”. Now upload an image or select one from the media library. Add a high-volume search term or keyword on the “title” and “alt text” fields. Now click on the “select” button.
Step 6 – Publishing Your Blog Post
Finally, make sure to proof-read the article, that all your images are optimized, and that your title and subheadings are engaging and coherent. Now click on the “publish” button. And this is it! We recommend you to keep coming back to your blog posts so you can update them as needed!
Chapter 4: How To Get Your YouTube Marketing Videos On The First Page Of Search Results In 2019-20
Did you know that you can rank a YouTube marketing video on the first page of search results right after you publish it? There’s a lot of competition on YouTube, and it can be quite hard to get the exposure you need to grow, but with this powerful trick you’ll be able to outrank all the other videos targeting the same keywords you do.
Let’s start by uploading a video to YouTube. Click on the camera icon on the top-right corner, and then click on the “upload video” option.
Now click on “select files to upload”, locate the video that you’re going to upload and double-click on it. Your video will start uploading, and you can optimize it while it processes, so let’s do that now.
Optimizing The Video Title
Start with the video title. An optimized video title has to be at least 5 words long, and it has to include high-volume search terms and keywords in your niche, as well as the name of your brand, product, or service.
Type your video title in the “title” field. In this example, we are going to enter a high search volume term in our target niche, followed by our main target keyword.
Now, to help the YouTube and Google search algorithms to better understand the relevance of your video, you have to add a video keyword to the title. Video keywords are keywords that YouTube ranks higher because they’re targeted by the most popular videos uploaded to the site.
Video keywords that we recommend you to use include: “Review”, “How To”, “Tips”, “Tutorial”, “Cute”, “Funny”, and keywords related to fitness, sports, health, and lifestyle niches. In our example, we are going to strategically include two video keywords at the end of our video title: the “tips” keyword, followed by a hyphen, followed by the “tutorial” keyword. This way we will make our video appear on searches that target any of the two video keywords.
Optimizing The Description
Now you have to optimize the description. Here you simply have to insert your website URL first, and then to add a brief description that includes your highest volume search term and your main target keywords. Make your description up to 250 characters or shorter. This helps the Google algorithm to index the video more quickly.
Adding Tags
Search engines scan tags to index and rank your videos. The best way to add tags is by adding the search terms and keywords with the highest search volumes in the “tags” field.
Publishing Your Video
Now that you have processed and optimized your video you just have to click on the “publish” button.
Verifying Your Ranking
YouTube videos are ranked immediately. This is because the YouTube and Google algorithms give a very high priority to video content uploaded to the platform.
You can check how high your video ranked on search results right after you publish it. Type one or more of the keywords and search terms that you targeted in your video title into the search bar, and then click on the “search” icon. As you can see, the video ranked at the top of search results for these search queries.
You can also try checking how high you ranked your video over on google.com. Just enter the same search terms in the Google search bar and hit “enter”. Here you can see how the video ranked on top of video search results.
As you can see, this simple yet powerful trick will allow you to outrank anyone else posting marketing videos in your niche!
Chapter 5: How To Compose Killer Social Media Marketing Posts In 2019-20

Social media platforms are a powerful marketing tool. On social media it is easier to find active users that are ready to engage with your content. And social media users, when engaged, are easier to qualify, capture, and convert.
In this lesson we are going to show you how to compose killer social media posts on top social media platforms in 2019-20.
Composing A Killer Marketing Post On Facebook
Start on your Facebook business page and click on the “write a post” box to get started. Facebook marketing posts are best used to drive traffic to external pages or content. You can do this by teasing content with a brief statement followed by a call-to-action.
You can create the statement by quoting a quote from the article or text in the destination URL. The intention is to drive curiosity.
In this example, we are going to send people to one of our content pages, so we’ll quote the article in the link. Then we are going to add a call to action to encourage users to click on the link to continue reading.
You always have to link to an external URL where users have to take action. There are two methods to add a link to your Facebook marketing posts.
The easiest method is by pasting the URL below the text. Facebook will automatically create a clickable link preview that will appear below the text and that users can click through. This link preview will pull the feature image in the destination URL and will insert it to the post. You can delete the text URL from the post after the link preview loads.
The other method is by adding a shortened URL directly below the text. To shorten a URL, go to “bit.ly” in your browser, and then paste the URL in the “shorten your link” field. Now click on the “shorten” button.
Click on the “copy” button to copy the shortened URL and go back to Facebook. Now paste the shortened URL below the text.
When you include a shortened URL in your post, you can replace the link preview with a branded image, video, or infographic.
To do it you simply have to delete the link preview by clicking on the “x” icon, and then clicking on the “photo or video” button to upload your branded image or video. You can click on “share now” or schedule your post after you upload your custom image or video.
Composing A Killer Marketing Post On Instagram
Instagram is a visual discovery platform, so before composing your post, you have to shoot a photo, to upload an image, or to record a video.
To add media to a new post, simply tap the camera icon to take a picture or record a video. You can tap on the “plus” icon on the bottom of the screen to access the gallery and upload an image from your device.
In this example, we’re going to select a product image from our gallery. You can tap on “next” after selecting an image to continue.
You can edit your image or video by adding a filter and adjusting other settings. Use these settings to generate a branded look for all your posts. By using the same visual effect on all your posts you will increase brand recall. You can tap on “next” to continue after you finish editing your media.
Now it is time to compose an Instagram marketing post. Instagram marketing posts are best used to generate engagement, reach, brand awareness, and product consideration.
Instagram marketing posts don’t follow a unique structure like on other social media channels. You just have to include your target keywords and search terms, a call to action if you’re promoting an external URL, and hashtags.
In this example we’ll start by composing a compelling caption where we target product keywords and search terms related to the product in our image. To increase curiosity, we are going to open our caption with a question where we target a product keyword. Next we are going to add a relevant search term and a description of the product that we are promoting.
Now we’re going to add a call to action to encourage users to visit the link in our bio to learn more about the product.
Instagram won’t allow you to insert external URLs to your marketing posts, so you have to add your links to your bio by going to your profile and pasting your landing page URL into the “website” field. This is the only placement where you can add a clickable URL on Instagram.
Now it is time to add hashtags. Hashtags are used to increase discoverability. You can add up to 30 hashtags to an Instagram post, but we recommend you to add a maximum of 9 hashtags. Only add keywords that are relevant to your post as hashtags. Always make sure to research the best hashtags for each post. You can tap on “share” when you are finished composing your new Instagram marketing post.
Composing A Killer Marketing Post On Twitter
Start on your Twitter profile and click on the “tweet” button to get started. Twitter marketing tweets are best used to generate engagement, to drive website visits, and sales.
In this example we are going to show you how to create Twitter marketing posts to drive website visits and sales. These types of marketing tweets are straightforward, and they only include a call to action encouraging users to check content or a promotion on a destination URL.
First, type a brief description of the content or offer that you’ll promote. In this example we’ll promote an article about a product, which contains a link to a sales page at the end, so we will start with the name of the product, followed by a product keyword, followed by a description of the product. Now we’ll follow with a call to action to encourage users to check the article, and we’ll insert the URL at the end.
Now it is time to add an image, video, or gif related to the content or offer. Click on the “add photos or videos” button or on the “add a gif” button to upload media to your tweet. You can click on “tweet” when you are finished composing your marketing tweet!
Chapter 6: Amplifying Your Reach With A Paid Facebook Marketing Campaign In 2019-20
Facebook is perhaps the best social media platform to promote your business, and you can give an explosive boost to your complete internet marketing plan by running a paid marketing campaign on Facebook.
In this lesson we are going to show you how to amplify your reach with a paid Facebook marketing campaign, step by step!
Accessing The Ads Manager And Creating The Campaign
To start creating a Facebook advertising campaign you have to access the Facebook Ads manager. You can access the ads manager by going to http://facebook.com/adsmanager/creation on your browser while logged in to your Facebook account.
That URL will take you to the campaign creation screen, where you have to select a campaign objective to get started. Campaign objectives are pre-built campaign setups that are optimized to help you achieve specific marketing goals.
Because your marketing goal with this campaign is to increase your reach, you have to click on the “reach” option under the “awareness” column.
Now enter a name for your new ad campaign in the “campaign name” field, and then click on the “set up add account” button.
Next you have to select your account country, your currency, and your time zone. Click on “continue” after selecting this info.
Creating The Ad Set
Next up you have to create the ad set for this campaign. First, enter a name your new ad set in the “ad set name” field. Now select the Facebook page that you are going to promote from the “Facebook page” menu.
Now you have to set up the target audience. With Facebook ads you’ll be able to hyper target your audience for better results. First, select the locations that you are going to target in the “locations” section. To select a location you have to type the name of a location in the text field above the map and to click on it to select it. You can target more than one location on a single campaign!
After selecting a location, you can select to target “everyone in this location”, “people who live in this location”, “people recently in this location” or “people traveling to this location”.
Now select the “age” of your target audience. Now select the “gender” of your audience. Now select the “languages” of the audience that you want to reach. To select a language, click in the “languages” box, type the initials of the language that you want to target, and click on it to select it. You can target more than one language.
In the “detailed targeting” section you can “include” or “exclude” people based on “demographics”, “interests”, and “behaviors”. In the “connections” section you can select to reach users according to the type of connection that they have with your page, such as “people who like your page” or “friends of people who like your page”.
In the “placements” section you can select the placements where to show your Facebook ads. If you select “Automatic placements” your ads will appear to all users on all types of devices across multiple placements that include Instagram and the Audience Network.
If you select “edit placements”, you can select where you want to show your ads and on what devices.
On the “budget and schedule” section you have to select a budget and a schedule for your campaign. Select “daily budget” if you want to spend a fixed daily amount, or select “lifetime budget” if you want to spend your entire budget until your campaign ends or you deplete your budget.
On “schedule” you can select “run my ad set continuously starting today” to run your ads until you stop them manually, or you can select “set a start date and an end date” to select when your ads start running and when the campaign ends. You can click on “continue” to move to the next step.
Creating The Ad
Now it is time to create the ad. Start by typing the name of your new ad in the “ad name” field.
In the “Identity” section you have to choose how you want to represent your business in your ad. By default, the Facebook page that you selected when you created the ad set will be selected here.
Now you have to select your ad format. The ad formats available for this type of campaign are “carousel” and “single image or video”. Let’s select “single image or video”.
After selecting a format you have to upload media to use on your ad. Select “image” if you’re going to use an image. Select “video or slideshow” if you are going to use a video or slideshow.
On the “text” section you have to add your ad copy, ad text, and your ad URLs. Start by adding your ad copy to the “text” field. Now check the “add a website URL” box and enter your destination URL in the “website URL” field.
Now enter your ad headline into the “headline” field. Now add a brief description or value proposition to the “news feed link description” field.
Now click on the “call to action” menu to add a “call to action” button to your ad. You can preview how your ad will appear on different placements in the “ad preview” window.
You can click on the “confirm” button to submit your ad for approval. Approval usually takes between 10 and 15 minutes. As you can see, running a paid ads campaign on Facebook is easy when you know the steps!
Chapter 7: Generating Qualified Website Traffic With A Google Ads Campaign In 2019-20

You can significantly boost search traffic to your website with a targeted traffic generation campaign on the Google Ads platform, Google’s advertising solution for advertisers. To use Google Ads you just need an active Google account.

Accessing Google Ads And Creating The Campaign
To access “Google Ads” go to “ads.google.com” on your browser while logged in to your Google account. You will be redirected your Google Ads dashboard. Once in the dashboard, click on the “campaigns” tab on the left-hand menu. Now click on the “plus” button, and then on “new campaign”.
Start by selecting a campaign goal. To generate qualified traffic you have to select “website traffic” as your campaign goal.
Now you select your campaign type. There are four different campaign types: “search”, “display”, “shopping”, and “video”.
“Search” campaigns allow you to serve ads on top of search results pages on Google. They’re easy to set up and cheap to run. Select “search” as your campaign type. Now enter your business website URL in the “business website” field and click on “continue”.
Setting Up A Traffic Generation Campaign
Now it is time to set up the search campaign. Start by entering the name of your new search campaign in the “campaign name” field.
Now move to the “targeting and audiences” section. Start by selecting your target “locations”. You can target “all countries and territories”, your current location, or “another location”.
Now select the “languages” that your audience speaks. Click on the “select a language” field and select languages from the menu.
Now move to the “budget and bidding” section. Start on “budget” and enter your daily ad spend in the “budget” field.
Now move to “bidding”. Here you can select a different bidding optimization option and enter a “maximum cost-per-click limit”. The platform simplifies bidding for you by selecting the best bidding strategy according to your selections.
You can also insert “ad extensions” into your ads. Ad extensions allow you to show additional information on your ads. You can insert “sitelink extensions” to add additional links to your ads, “callout extensions” to add more business information to your ads, and “call extensions” to add a phone number to your ads.
Next, review your campaign settings and click on “save and continue” to move to the next step. Now you have to set up the ad groups. Start by entering a name for your new ad group in the “ad group name” field.
Creating The Search Ad
Now it is time to create the search ad. Start by entering your landing page URL in the “final URL” field. Now use “headline 1” to add a high search volume term, and “headline 2” to add a keyword-rich call to action. Make sure each headline is 30 characters or less.
Now use the “description 1” field to add a brief description of your business, URL content, or offer. You can expand your description text using the “description 2” field. Now review the information that you added to the ad.
You can create variations of this ad by clicking on “new add”. Click on “save and continue” if you’re not going to create more ads on this page.
Now type or paste the keywords, terms or phrases that’ll trigger your ads on search results pages in the keywords box, each one separated by a line. You can click on “save and continue” after you enter all your keywords to move on to the final step.
Now review your campaign settings and confirm by clicking on the “continue to campaign” button. And this is how you can create and run effective traffic generation campaigns on Google Ads!
Chapter 8: How To Create A Powerful Email Marketing Campaign In 2019-20
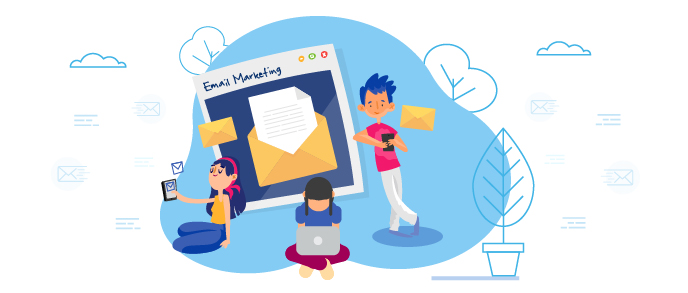
No complete internet marketing plan is really complete without an email marketing campaign. Email marketing is still one of the most high-converting and cost-effective online marketing strategies you can implement.
With email marketing you can reach your leads and potential customers right where they’re most likely to convert: in their email inboxes. Today we are going to show you how to create a powerful email marketing campaign, the easy way, in 2019-20.
Step 1 – Prepare Your Email Incentive
If you want to convert website visitors into email subscribers, then you have to set up an attractive email incentive. The most powerful type of email incentive is a lead magnet.
A lead magnet is an exclusive piece of content that you offer to visitors in exchange for their email addresses. A lead magnet can be an eBook, video training, report, or infographic that you only send to people that sign up to your mailing list through your opt-in page.
As you can see here, we have prepared an eBook with content that is not on our website. If a visitor wants to get the eBook, they will need to sign up to our mailing list.
Depending on your type of business, you can also offer incentives such as discount codes and coupons.
The next step after preparing your email incentive is building your email campaign, so let’s move on!
Step 2 – Building Your Email Campaign
Creating An Email List
You need to create an email list to collect the email addresses of people to sign up to your mailing list. An email list is simply a database that connects to your sign-up forms. When a lead enters their email address into the sign-up form, it is saved to your email list.
The easiest way to create an email list is with an email marketing service. In this example we’ll use MailChimp to show you how to create an email list the easy way, in very few steps. We chose MailChimp because it offers you basic email marketing features, and you can use it to capture up to 2,000 subscribers and to send up to 12,000 emails a month, all for free so you can get started right away.
Let’s start on the MailChimp dashboard. Click on the “audience” option on the top bar. Now click on the “create audience” button.
Now it is time to set up the email list. First, enter a name for your new list in the “audience name” field. Now enter the sender email address that you want your subscriber list to see into the “default from address” field. Now enter the sender’s name in the “default from name” field.
In the “remind people how they signed up to your list” field, enter a brief statement to remind subscribers what they agreed to when they signed up. In this example, we’ll remind subscribers that they opted in to receive the free eBook.
You can additionally enable “form settings” such as “double opt-ins” and “notifications”. You can click on “save” when you finish setting up your new email list.
Setting Up A Sign-Up Form
Now it is time to create a sign-up form to capture email contacts on your site. In this example we will use MailChimp’s built in sign-up form builder.
If you’re using MailChimp, click on the “create a sign-up form” option on this page to get started. Find the “subscriber pop-up” option and click on the “select” button.
Now you have to design your pop-up opt-in. First, select your pop-up format. In this example we’ll select “slide” because it doesn’t interrupt the user experience.
Now click on the “display” menu to select when to show your pop-up. Here you can select to show your pop up to visitors immediately, after 5 seconds, after 20 seconds, after scrolling to the middle of the page, after scrolling to the bottom of the page, or on exit. In this example we will select “scroll to middle of page”.
Now select your “image alignment” and “font”. In the “button style” section, enter your opt-in copy into the “text” field.
A neat internet marketing trick is to use calls to action in the first person. So instead of typing “sign up now”, you type “Yes! Sign me up!”.
Now select “text color”, “background color”, and “hover color”. For the best effect, select white as “text color”, green as “background color”, and red as “hover color”. Now check the “full width” option to make the CTA button the same size as the sign-up fields. Now click on “add photo” to add the image of your email incentive to the pop-up.
Now click on the “fields” tab, check the “first name” option, and then click on “required” to make it a required field. By asking for the first name on sign-up forms, you can personalize the emails that you send to your subscribers.
Now click on the “content” tab. Click on the “body” field to add a call to action on the pop-up. Now click on the “sign up success message” field to add a thank you message and the URL to claim your email incentive.
To add this URL, click on “insert link”, then click on the “link to” menu and select the format of your email incentive. In this example, we’ll select “file”, then we’ll upload and add our lead magnet to the file library, and then we’ll click on “insert”.
Now that your email capture form is complete, click on the “generate code” button to generate an embed code to add the pop-up to your site, and then copy the embed code. Now you have your email list connected to your email capture form, and you can insert it to your site by pasting the embed code into your sites HTML!
Chapter 9: Recovering Abandoning Visitors With Remarketing In 2019-20
One of the most painful challenges a complete internet marketer faces is losing visitors and leads. The good news is that remarketing is a crucial strategy to implement on any complete internet marketing plan.
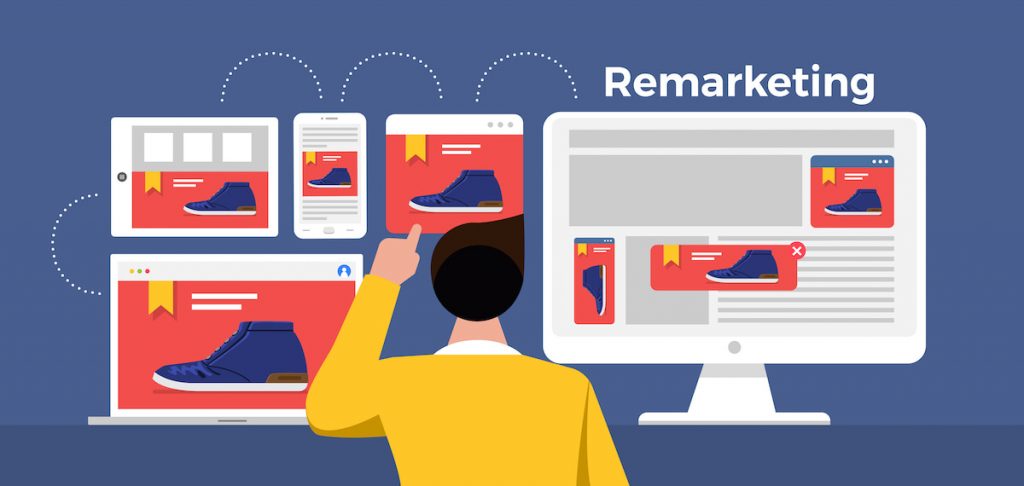
What Is Remarketing In 2019-20?
Remarketing is a complete internet marketing strategy intended to recover abandoning website visitors and leads. Remarketing works by tracking visitors leaving a website to other websites they visit, where they’re served ads promoting the website that they abandoned.
Today we are going to show you how to easily implement remarketing into your complete internet marketing mix. In this lesson we are going to use the Facebook remarketing platform. By choosing the Facebook remarketing platform, we will be able to reach abandoning website visitors right in their Facebook timelines. Let’s get started!
Generating A Remarketing Code
Like we said, remarketing works by tracking abandoning visitors from the original website they abandoned to the websites they visit during the same session. To track website visitors from one site to another, remarketing platforms install retargeting codes on the websites that they remarket.
The Facebook tracking code is called a “retargeting pixel” and you can create yours from the Ads manager.
Start by going to “facebook.com/ads/manager” while logged in to your Facebook account. Click on the menu icon on the top-left, and then click on the “pixels” option under “measure and report”.
Once on the “events manager” page, click on “add new data source” and then on the “Facebook pixel” option to open the “create a Facebook pixel” window.
Now enter a name for your new retargeting pixel in the “pixel name” field, and then click on “create”. Your Facebook Retargeting pixel is ready, and now you have to install it on your website.
In this lesson we are going to show you how to install the Facebook pixel manually, so click on the “manually install the code yourself” option to continue to the next step.
Installing The Remarketing Code On Your Website
Now find your Facebook Pixel code in this new window and click on it to copy it to your clipboard. You have to paste this code between the “<head>” and “</head>” tags of your website code before you are able to create your first remarketing campaign.
In this lesson we are going to show you how to install it manually on a WordPress website. Go to your WordPress site’s dashboard, move over the “appearance” tab on the left-hand menu and click on the “theme editor” option.
Now go to the “theme files” menu on the right and locate “theme header. Click on “theme header” to access the header section of your website code. Paste your remarketing code between the “<head>” and “</head>” tags, and then click on “update file”.
Now go back to Facebook, enter the URL of your website in the “enter the URL for this website” field and click on the “send test traffic” button.
Now confirm that test traffic is “active”. If test traffic is active, it means that you’ve successfully installed the code on your website, and you can now click on “continue”.
Next up you have to “add the events you’d like to track”. To track and recover abandoning visitors, you have to activate the “view content” event.
Now copy the event code generated below and go back to the header section of your website’s code. Paste the event code right below the “</head>” tag and click on the “update file” button. Then go back to Facebook and click on “done”.
Setting Up A Remarketing Campaign On Facebook
Now you can create your first remarketing campaign on Facebook. Go to the campaign creation page in the ads manager and select the “conversions” objective. Enter a name for your new remarketing campaign in the “campaign name” field below, then click on “set up ad account”. Now select your “account country”, your “currency”, and your “time zone”. Then click on “continue”.
Now you have to create the ad set for his campaign. First, enter a name for your new ad set in the “ad set name” field. Now go to the “conversion” section. Here select “website”. Click on the “conversion event” box and select “view content”.
Next you have to define your target audience. In this example we are going to select a saved audience that we targeted with a previous campaign. To select a saved audience, click on the “use a saved audience” tab and select a saved audience from the menu.
Next you have to define how much you are going to spend in the “budget and schedule” section. Select your budget type, enter the amount you are going to spend, and select a schedule. You can click on “continue” after you enter all the information required here.
Now it is time to create the ad for your new remarketing campaign. First, enter a name for your new ad in the “ad name” field.
When you create ad campaigns on Facebook you can use existing page posts as ads. In this example we are going to select and promote an existing post from one of our Facebook pages.
To use an existing page post as an ad, click on the “Facebook page” menu inside the “identity” section, select the page that you are going to use to represent your business in your ads, and then click on the “use existing post” tab.
Now go to the “creative” section and click on “select post”. Now select the page post that you are going to promote and then click on “continue”.
As you can see, this page post has a shortened URL that links to a content page on your business website.
You can now preview your promoted page post in the “ad preview” section. Click on the “confirm” button to send your ad for review when you are ready. Your new remarketing ad will be approved to start running in the next 5 to 10 minutes. This is actually the easiest, most effective way to recover abandoning website visitors!
Chapter 10: Generating More Sales Leads On Autopilot With A Facebook Messenger Bot In 2019-20
Using Facebook as one of your business’ main communication channels is a top complete marketing strategy. But because customer care can be time-consuming, we’ve searched and found a way to automate it.
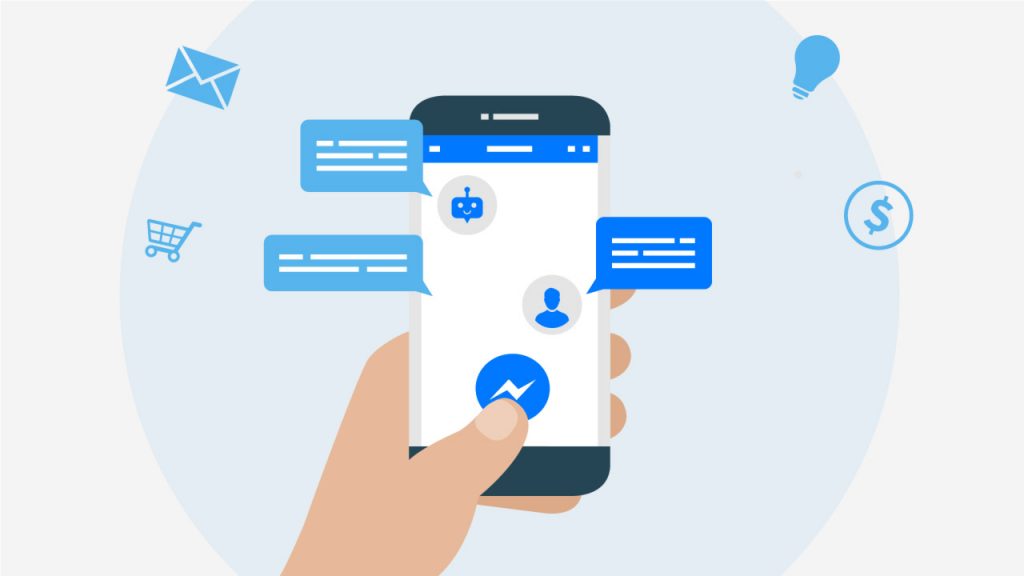
In this lesson we are going to show you how you can easily automate lead capture and nurturing on Facebook with a messenger chatbot.
Finding The Right Messenger Bot Solution For Your Business
To use Messenger Chatbots, you first need to sign up to a good automation platform that offers chatbot integration. We have used and recommend “MobileMonkey”, an official Facebook Marketing provider that lets you build your own chatbots for free.
With MobileMonkey, you don’t need to know how to code to build your own chatbots. You just have to go to https://mobilemonkey.com/ and to click on “get MobileMonkey free”. Then click on “get started for free” while logged in to your Facebook account to connect to the service.
Building A Messenger Chatbot
After connecting MobileMonkey to your Facebook account, you will be asked to connect MobileMonkey to the Facebook page where you will install your new messenger chatbot. Select the page where you’ll install your new chatbot and click on “connect”.
Next you can select a chatbot template. In this example, we’ll skip selecting a template so we can show you how to edit your chatbot from scratch. Select “start from scratch” and then click on “let’s do this”.
Now you will get access to the chatbot editor. The first thing you have to do is to customize and activate your chatbot. Click on the “settings” tab on the left-hand menu. Enter a name for your Messenger chatbot in the “chatbot name” field. This is the name that users that send you Messenger messages will see in the messenger window.
Now click the lever button on the “chatbot status” column to activate your chatbot. You can click on the “language” menu to select a different language for your chatbot.
Now click on the “bot builder” tab to go to the chatbot builder section. In this section you can create chatbot dialogues. Chatbot dialogues are triggered according to what users type when they send Messenger messages to your pages. There are two types of chatbot dialogues that you can create here.
“Dialogues” are simple dialogues that you construct to engage users, such as welcome dialogues and dialogues designed to qualify leads. “Q and A” dialogues are triggered when users type messages or questions that contain specific keywords. You can construct “Q and A” dialogues by picking what type of dialogues are triggered by keywords that you choose.
Start by creating a “dialogue”. Click on the “dialogues” option. Here you will find two pre-built dialogues: a “welcome dialogue” to greet users when they send you a message, and a “default dialogue” to send users a default message when no other options are available.
You can edit the messages in these dialogues to replace the default text with your own custom messages. In this example, we’ll edit the welcome dialogue to add a custom greeting.
Now we’ll edit the default dialogue to add a custom dialogue to ask users to wait while we process their information. You can insert additional elements to your dialogues, including images, quick questions, and GIFs by selecting them from the top bar.
You can add additional dialogues by clicking on the “add dialogue” button. Let’s create an additional dialogue that will be triggered after users leave us a comment or question.
Click on “add dialogue”. Now enter the name of this dialogue in the “dialogue name” field. Now click on “create dialogue”. Now select with what type of widget you’ll open this dialogue. In this example we’ll select “text” to enter our message.
Now click into the “enter your text” field to type your dialogue. In this example, we’ll enter a message to let users know that we’ll be checking their info and that we’ll be back with them shortly. You can add as many additional dialogues as you need to use.
Let’s now create a “Q and A” dialogue. Start by clicking on the “Q and A” tab on the left-hand menu. Now click on the “new Q and A” button.
“Q and A” dialogues are triggered when users include certain keywords in their messages, so you have to insert the keyword that you want to trigger a “Q and A” dialogue into the “if user says” text box.
Let’s create a quick example. Try inserting a product keyword. If a user includes that product keyword into one of his messages, the chatbot will trigger a dialogue that includes a product recommendation and a sales page URL.
Next you have to program your chatbot response to this keyword in the “bot replies with” column. First, select how your chatbot will respond. You can select “text” if you want to make your chatbot reply with a custom message.
Or you can instead select “dialogue” if you want your chatbot to reply with one of your dialogues from the “dialogues” library.
In this example, we’ll select “text”. Then we’ll insert our product recommendation, followed by the sales page URL. You can add additional “Q and A” dialogues by clicking on the “new Q and A” button.
As you can see, automating customer care on Facebook as part of your complete internet marketing plan is easy!
Chapter 11: How To Funnel More Qualified Leads And Referral Traffic To All Your Marketing Channels With A Giveaway
Giveaways, sweepstakes, and competitions are all great tools that you can integrate into your complete internet marketing plan to move qualified leads deeper into your conversion funnel.
In this lesson we are going to show you how you can funnel more qualified leads and referral traffic to all your marketing channels with a giveaway campaign in 2019-20.
Setting Up A Giveaway Campaign, The Easy Way
The best way to set up giveaway campaigns in 2019-20 is by using contest platforms. In this lesson we are going to use “Gleam”, a contest platform that allows you to run unlimited competitions, for free.
Go to your “Gleam” account after signing up and click on the “new competition” button. Now enter the name of your new contest in the “name” field. Here you can add an actionable phrase and include the name of your prize. This will help you encourage users to participate and share the contest. Now select the “start” and “end” dates of your giveaway campaign using the calendar functions on this screen.
Now click on the “user details” tab and paste your Facebook Page’s URL in the “Allow users to Like a Facebook Page” field.
Now click on the “how to enter” tab. On this page you will be able to select how contestants will earn their entries.
As you can see here, you can refer traffic to all your marketing channels as entry methods. For example, a user that reaches your contest through your website will have to visit your Facebook, Twitter, and Instagram profiles to earn additional entries. This strategy allows you to generate lots of referral traffic to all your channels.
In this example, we’ll add website visit, YouTube visit, Facebook visit, Instagram visit, and Twitter follow as entries to our campaign. Let’s start by adding the website visit entry. First, click on the “visit a page” option from the entry method menu.
Now move over the “visit a page” column to customize this entry. Start by adding a call to action inviting leads to visit your website into the “title” field. Now enter the number of valid entries participants earn into the “worth number of entries” box. Now check the “mandatory” option.
Now enter your website or landing page URL into the “link URL” field. Now enter CTA text into the “button text” field.
Now let’s add the YouTube entry. Click on the “YouTube” icon. Now click on “visit YouTube channel”. Enter your YouTube channel URL into the “channel URL” field and check the “mandatory” and “require authentication” options.
Let’s now add the Facebook entry. Click on the “Facebook” icon. Now click on the “Visit on Facebook” option. Now enter the URL of your Facebook page in the “URL” field, select the “like the page” option below, and check the “mandatory” option.
Let’s now add the Twitter entry. Click on the “Twitter” icon. Click on the “follow on Twitter” option. Enter your Twitter handle in the “username” field and check the “mandatory” box.
Let’s now add the Instagram entry. Click on the “Instagram” icon. Click on the “visit Instagram profile” option. Enter your username or Instagram profile URL in the “username or profile URL” field, and check the “mandatory” box.
As you can see, there are several other marketing channels that you can add as entries, including LinkedIn, Pinterest, Snapchat, and Twitch. Other entry methods that will help you to increase referral traffic and generate leads include “viral share” and “subscribe to a newsletter”.
Now click on the “prize” tab. Enter the name of your prize in the “title” field. Select the number of winners you’ll pick and enter a description of the prize.
Now click on save to finish creating this giveaway. And that’s it! You can now share this contest by embedding it to a page on your website, by sharing the giveaway’s landing page URL, and by adding a Facebook tab for this giveaway on your Facebook pages!
Chapter 12: Building A Complete Internet Marketing Plan For 2019-20
The world of internet marketing is always advancing and changing. Platforms update their services, people change their online habits, niches grow, and new trends emerge all the time.
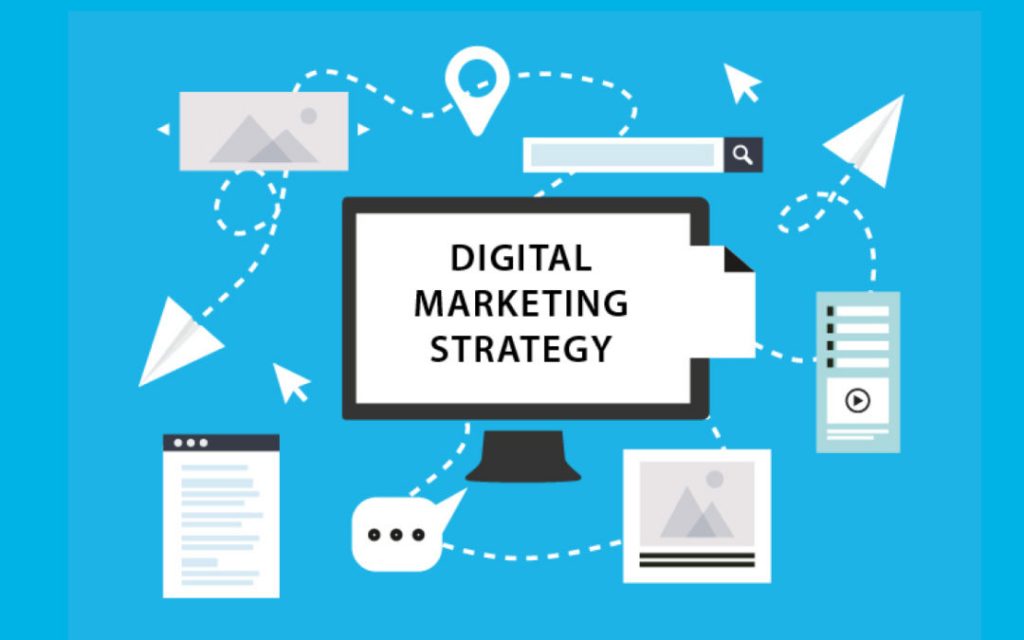
That is why you need to develop a plan that is flexible enough as to help you adapt to these changes without you having to go back to the drawing board.
Today we are going to show you the steps you’ll need to take to develop a complete internet marketing plan that will work in 2019-20 and beyond!
Step 1 – Define Your Audience And Its Needs
The first step you have to take is to learn more about your audience. Knowing your audience well is what will let you target the type of internet user that is more likely to become a customer for your business.
The first thing you have to do is find out where your audience hangs. Start by doing a keyword research on Google using niche keywords, product keywords, and search terms. Then take note of the top places in search results. It might be forums, blogs, or eCommerce sites.
Then do the same keyword research on social media. You can do this keyword research on all social media platforms you want.
Now that you’ve found where your audience hangs, start monitoring their conversations. Focus on their sentiments, their pain points, and their opinions about the products or services that you offer. In other words, find out what it is that your audience wants of your brand so you can offer that.
Lastly, you have to create a buyer persona. A buyer persona is the profile of your potential customer. To build a buyer persona you need to find the average age of the people in your audience, the dominant gender in your audience, their buying habits, their online activities, their average level of education, their demographics and locations, what brands they discuss, and what other products, services, and niches they’re interested in.
Building a buyer persona will help you to better target organic traffic with your content as well as to define audience targeting when running paid advertising campaigns.
Step 2 – Segment Your Audience
Once you’ve defined your audience you will find that there are different types of people in it. You have to add each one of these groups of people to a segment.
All you have to do is to create audience segment lists. Most marketing and advertising channels allow you to create and save audience segments, and you can also save them to a spreadsheet.
Step 3 – Develop A Conversion Funnel
You have to develop a conversion funnel if you want to drive conversions more effectively. With a conversion funnel you can plan how you will drive a visitor to your content pages, from your content pages to your mailing list, and from your mailing list to your sales pages.
To create a conversion funnel, you have to define at what point the customer journey starts. For instance, your customer journey could start on your blog, when a potential customer is searching for information about products related to those you offer.
Next you have to define the consideration stage. This is the point in which the customer starts considering your products and offers. At this stage, your potential customer might start engaging more with your brand across your channels.
Next you have to focus on the desire stage. In this stage, your potential customer actively likes your products, yet hasn’t made a purchasing decision. He might need to further compare the quality, price, or other attributes of your products to other options. In this stage, you have to make an effort to capture your potential customer by offering them deep discounts, free trials, or samples.
The next stage is the action stage. Here your potential customer made the decision to buy from you, and your job is simply to make the buying process as seamless as possible.
The last stage is the nurturing stage. If the customer liked your product, then he can become a repeat customer. In this stage, your job is to nurture your customer with perks, gifts, promotions, and exclusive offers.
Step 4 – Implement A Smart Content Marketing Strategy
If you’re already using content marketing, it might be time to implement some optimizations to achieve a smarter content marketing strategy. Whether it’s video, articles, or visual discovery, some elements that you have to implement to enhance your content are:
Appeal to human emotions to make your content more relatable and engaging. Use humor, drama, and nostalgia to hit your audience’s core emotions.
Optimize all your content for search by using the right type of keywords.
Optimize all your content for all types of devices and operating systems.
Step 5 – Develop A Cross-Platform Flow
Make no mistake, all your content should be released on all your marketing channels, but you have to do it intelligently. If you only post the same message across all your channels, then it won’t work.
What you have to do is to optimize your message for each channel and to link your content from one channel to another.
For example, you can tease a piece of content with a brief message with a single image on Twitter, and add a link to the full story on Instagram, where you’ll add a longer piece of content and a more captivating image inviting users to follow the link in the bio, where you can direct them to a complimentary content piece on your website!
Step 6 – Refine Your Email Lists
Pay attention to those email subscribers that are opening and interacting with your emails.
Add them to a new list and send them emails with more offers and actionable elements.
Step 7 – Audit And Optimize
Establish a complete internet marketing calendar where you define a date to audit your campaigns.
Check, test, and benchmark your results on this date and make modifications on areas where improvements are needed.
For example, if one of your articles is getting low bounce rates from social media traffic but a low number of visits from search, it might mean that you need to modify the article headline and metadata.
Chapter 13: Alternative Internet Marketing Methods That Make Instant Money In 2019-20
The world of internet marketing is full of methods that go beyond promoting your own business.
If you want to compliment your income and have some fun while you’re at it, we encourage you to try our favorite alternative internet marketing methods.
Personal Branding
One of the best things to come out of internet marketing is personal branding. Personal branding is the process of marketing yourself, and there are several benefits of doing it.
First off, marketing yourself allows you to build up trust and authority around your persona. When you build a personal brand, it gets easier to promote a larger business, as people have already learned to trust you and your personal brand.
And Secondly, it opens up a lot of networking opportunities. By creating a personal brand, you’ll be able to create more partnerships, to attract sponsors, and to get more invitations to discuss your products or business as a guest on other people’s blogs, newsletters, and YouTube videos.
Podcasting
Podcasts are audio sessions where you discuss a topic of interest for the benefit of your audience. With podcasting you can create a closer connection with people that might be interested in what you have to offer because they can hear you speak to them directly about their pain points.
This humanizes the way you promote your products and services, and makes it easier to encourage them to take action.
Webinars
Webinars are live video sessions where you discuss a content piece on camera. Most of the time, webinars are used as mini-courses to introduce leads to a product or service.
In the majority of cases, access to webinars is restricted to those that register with their email addresses to reserve a seat. When a person registers for a webinar, you can send them reminders to attend, and you can also send them a recorded version of your webinar if the person was not able to attend.
If the person attends, or downloads the recorded webinar, it converts them into a lead and qualifies them as a potential customer that you can keep nurturing and moving deeper down your sales funnel.
Influencer Marketing
Similar to personal branding, influencer marketing is the process of building a relevant presence on social media. You do this by creating an account where you provide valuable content and entertainment to a niche audience to build trust and authority.
Once you have built a following, you can use it in two ways. On one hand, you can promote your own business or affiliate offers. Your audience trusts and likes you, so it’s easier to convert them. On the other hand, you can use your following as social proof to get sponsorship deals.
Coaching And Consulting
You can use your complete internet marketing expertise to sell coaching and consulting services to other marketers. By providing high-quality advice and solutions to fellow marketers you’ll be able to build a solid reputation as an expert, while making some good money on the side.
Also, you can use your mastery of complete internet marketing to produce your own courses and books, which will provide you with a permanent income stream.
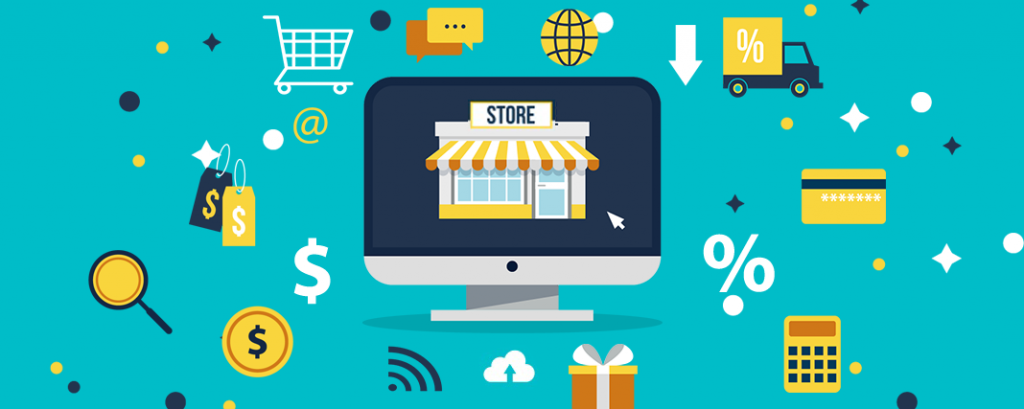
Chapter 14: Complete Internet Marketing Strategies For eCommerce Enthusiasts In 2019-20
eCommerce enthusiasts are lucky they can try so many different internet marketing tactics on their stores, but it can get overwhelming.
For them, we have listed our top complete internet marketing strategies that you can use on your eCommerce website.
Use Visual Discovery Platforms To Showcase Your Store Products
Posting professional-grade pictures of your best products on visual discovery platforms such as Instagram and Pinterest is a great way to drive interest for your brand and your offers.
It is also a very cost-effective way of promoting the products in your store. It is free to upload your product pictures to Instagram or Pinterest, and you can attract plenty of qualified traffic by adding relevant hashtags to all your product posts.
The key is to upload compelling photos to feature your products in different scenarios, to use hashtags strategically, and to stick to a publication schedule.
By adding attractive product pictures to your visual discovery posts and encouraging users to learn more about your products by visiting your product pages, you’ll be using these platforms to increase traffic and sales.
Launch A Facebook Store
You can use Facebook to drive interest about your products and to encourage direct visits to your product pages.
You can easily add a store tab to your Facebook business page where you can showcase all the products in your online store. Each time when users click on one of your products, they’ll see a call to action button encouraging them to buy it on your store.
Use Exit Intent Technology
You can add an exit intent pop-up to your eCommerce store as part of your email marketing efforts. You can use exit intent pop-ups to offer time-sensitive discounts to abandoning visitors, instructing them to join your mailing list to receive their discount code.
Offering a significant discount that is between 25% to 30% can help you achieve two objectives: first, it helps you drive a quick, easy sale from a visitor that wasn’t going to convert otherwise, and two, you can get a new email subscriber to nurture!
Add Live Chat
Potential customers want to get answers right away. Most of the people that enter your store will leave if they can’t find an answer to a question that they might have about your products or services.
To avoid losing potential customers because of this, we recommend you to implement live chat on your online stores. This creates an additional communication channel that is immediate!
Promote User Generated Content
One of the most effective ways to build social proof and trust in your brand is by encouraging existing customers to take and share pictures or videos of them using your products, or the final results of using one of your services.
Then ask them for permission to share them yourself on your social media channels, and tag them in your posts. This will help you to show actual people using and loving your products, and will expose your brand to your customers’ followers, increasing your reach.
Chapter 15: Complete Internet Marketing Best Practices In 2019-20
Complete internet marketing is crucial for the success and survival of your business online.
If your goal is to maintain a good pace, to avoid getting overwhelmed, to grow a healthy relationship with your audience and your competition, and to improve, you have to follow these simple best practices.
Know Your Audience
We have mentioned the importance of knowing your audience. You have a better chance of reaching the right type of customer if you know what type of people are more likely to buy from you.
However, knowing your audience also means knowing how to interact with it. If you don’t know how to engage people in your audience with a conversation, or what kind of topics they’re sensitive to, you run the risk of being perceived as out of touch.
The best approach then is to learn to talk to people in your audience when you respond to their comments on social media, or when you answer their direct messages and emails.
Update Your Search Engine Optimizations
On average, search engine algorithms go through 500 changes a year. Besides that, companies such as Google do not reveal what factors actually influence site rankings. As expert marketers, we simply trust our results and experience when it comes to applying optimizations.
So it is crucial that you update your search engine optimizations every three to four months. You don’t have to change the entire structure of your content; you simply have to audit the keywords and search terms in your content using the Google Keyword Planner to find if they’re still relevant, and to replace them with updated keywords and search terms.
Make Blogging A Priority
Blogging doesn’t only help you to attract qualified organic traffic and leads, it also helps you to keep your website alive. How? Search engines determine the health of your website by how active it is.
Posting long-form content regularly indicates to search engines that your site is active and that it can stay indexed.
So don’t conform with posting a truly great article once a month. Make it a priority to create 2 or more blog posts a week, because each content page that you create is an additional page that gets indexed, which in turn increases your site’s reach and discoverability.
Personalize The Customer Experience
Online customers expect brands to personalize their experience and to offer them content and advertising that is familiar to them.
You can personalize the customer experience by learning about the buying preferences of your potential customers by monitoring their online activities.
What’s more, personalization is a process that is automated by analytics tools, advertising platforms, and remarketing services, so there’s a wealth of sources from where you can get very specific information about your perfect customer.
So when you approach a customer on social media or by email, refer to them by their name and not their handle. Provide them with content about the stuff they like, engage them in social media, and follow them when appropriate.
Chapter 16: Advanced Complete Internet Marketing Tips and Tricks That Work In 2019-20
There’s a lot of competition in the world of internet marketing, with more and more brands and companies discovering that they can get faster results when they have all their strategies working together.
To stand out and get ahead, you will need to know some advanced tricks and to learn some tips from pros like us. Here is a list of advanced complete internet marketing tips and tricks that work in 2019-20.
Reverse-Engineer Popular Content
Creating content can be hard, especially new content. You not only have to research, fact-check, and write; you also don’t know for sure if the content you’re creating will be popular, or relevant. Our point is, it will take too much time out of your schedule.
To avoid this, you can simply investigate what topics and content is popular in your niche so you can reverse engineer it.
What you have to do is research what types of content your audience enjoys the most, what popular content pieces have gone viral before, and what websites publish that type of content. Use the “Google Keyword Planner” and the “Google Keyword Ideas” tool to enter your niche keywords and get suggestions.
Once you have a number of content pieces that you’d like to post, you’ll simply have to write them in your own words, to update them with newer, more relevant information, and to add your own graphics and media. This way you’ll save time and you’ll generate traffic more easily!
Curate Content
You can also share content from others without modifying it. You simply have to find website and content creators that are considered authorities in your niche, and then to share their content on your website and on your social media channels.
This is a powerful trick because your followers and website visitors are already familiar with those websites and content creators, so they won’t have a problem sharing their content pieces but through your own channels. This will help you reach their friends and followers, increasing exposure to your brand.
Send Social Media Posts At Strategic Times
Social media users on different social networks are the most active at different times of the day. So what becomes popular on Twitter at night might not make much noise on Facebook at the same time.
So just like Tuesdays are the best days to send or respond to an email, there are strategic times when to post social media to generate the most engagement:
On Instagram: at 8 AM, and 1 PM, and at 9 PM.
On Facebook: at 9 AM to 10 Am, at 12 PM to 1 PM, and at 4 PM to 5 PM.
On Twitter: at 8 AM to 10 AM, at 12 PM, and at 7 PM to 9 PM.
On LinkedIn: at 12 PM.
Use Geo Targeted Keywords

You can generate traffic from local searches to increase your site ranking and to generate more leads and sales from local customers by using geo targeted keywords.
Geo targeted keywords are simply long-tail keywords that target a location. Even if you offer digital services to international customers, you can target your location with geo targeted keywords in your content to increase your ranking for local searches in your niche.
For example, if you manufacture and sell water filters in the Americas, but your focus is on English-Speaking countries, then your main geo targeted keyword should be “water filters made in USA” and “water filters in Canada”, as those are the search terms that potential customers will use when looking for information about the product on Google.
Use Infographics To Condense Your Content
Some people on the internet won’t read your content, won’t read your PDFs, won’t watch your entire videos, and won’t listen to your podcasts; that’s inevitable. Some people do it because they don’t have the patience, the attention span, or the time to consume long-form content.
But you can get their attention with infographics. Infographics are simple visual representations of information, and they’re used by pro internet marketers to make content easy and quick to understand.
You can hire a freelance graphic designer to translate your content into beautiful infographics on sites such as fiverr.com for cheap, or you can use infographic makers such as “VENNGAGE” to create infographics that you can share on your content pages and on social media.
Chapter 17: Complete Internet Marketing Do’s And Don’ts in 2019-20
Do’s
Define Your Brand’s Identity
Developing a brand that people will remember and trust is an important part of your complete internet marketing strategy.
Delegate And Automate
Managing all aspects of a complete internet marketing campaign by yourself can get overwhelming quick, so we recommend you to delegate and automate time-consuming stuff such as social media management.
Stay Up To Date
Digital marketing tools, advertising platforms, and search algorithms are constantly changing and adapting to shifts in technology and laws, so it is important that you stay up to date.
Set Realistic Goals
Set realistic goals according to your budget, the size of your audience, the type of product or service that you are promoting, and the niche that you are targeting.
Offer An Excellent Responsive Experience
A lot of your traffic, leads, and customers will reach your marketing channels through mobile, so it is crucial that you develop assets that adapt, at the very least, to the most popular mobile devices to offer an optimal experience.
Repurpose Content As Video
Video marketing increases revenue by as much as 49% when used properly, and because of that we encourage you to repurpose your most engaging content as video.
Advertise
We recommend you to supplement your organic marketing strategies by investing in paid advertising, on every campaign. Search ads, display ads, video ads, and social media ads will boost your campaigns and your return on investment.
Track Your Performance
Use tools such as Google Analytics to track, analyze, and benchmark the metrics that are most important to your plan and to your goals.
Grow On Social Media
You can use social media for more than company updates or link sharing. Develop your brand identity on all your social channels and nurture your followers to create a solid fan base for your company.
Monitor Brand Mentions And Your Niche
Pay attention to what people are saying about your brand and other similar brands in your niche on the internet. This will help you to optimize your efforts according to what your audience wants!
Don’ts
Don’t Sacrifice Quality For Quantity
You don’t have to create a daily blog post, or to message people on social media 10 times a day. You just have to set a fixed schedule and release original, high quality, properly researched, and valuable content pieces to stay relevant!
Don’t Be On Every Social Media Platform
You don’t have to create a profile on every social media website imaginable to build an audience. You just have to find out what social media platforms best suit your business and focus on sharing highly engaging content on those.
Don’t Ignore The User Experience
Don’t overwhelm website visitors and email readers with lots of CTA buttons and images. Instead, focus on creating a visual experience that leads users to complete the actions that you want.
Don’t Sell Your Leads
It might be tempting to squeeze an extra buck out of your leads by selling their email info, but it’s always best to respect the privacy of your customers.
Don’t Argue With Your Audience
You’ll also be tempted to argue with online users when you receive a public complaint on social media or when you come across a negative comment on a content piece. But the best approach is to handle all commentary like a professional by providing a solution and by acknowledging criticism.
Don’t Spam
Don’t send too many email updates, don’t overload your social media pages with posts, and don’t fill all your videos with adverts. It doesn’t help your bottom line and can get you a lot of unfollows and unsubscribes.
Don’t Neglect Your Communication Channels
Make sure to always respond in a timely manner to direct messages, emails, comments, and replies on social media. Otherwise, users will stop engaging with your brand.
Don’t Mislead
Don’t promote a product that doesn’t work as advertised, or a low-quality service. Likewise, don’t use black hat strategies such as link cloaking.
Don’t Over Focus On Your Brand
Don’t spend too much time discussing your brand or business. Instead, focus on what your brand or business offers to the customer, and discuss their pain points.
Don’t Be Too Wordy Or Complex
Don’t drag on with too many technical details, or with praise to your brand. Don’t write long emails. Your marketing message has to be brief and easy to understand!
Chapter 18: Complete Internet Marketing Premium Tools And Services To Consider in 2019-20

“Meltwater” is a marketing insights platform that will help you spot online trends before they become popular, giving you a competitive advantage that is hard to beat. It is driven by artificial intelligence and uses analytics to benchmark your performance, as well as to track best-performing keywords.
“IFTTT” is a marketing integration platform that will help you to connect and test different marketing platforms and channels so you can see the possible results. It works by creating cues where you connect an app or device to another to create an action, such as uploading a photo to an image hosting platform, connecting it to an image sharing platform, and automating image sharing.
“Qzzr” is a user engagement tool designed to help you get richer customer profiles and more revenue by showing you how to ask the right questions to the right leads at the right times. With “Qzzr” you’ll be able to create quizzes that integrate with websites and landing pages and that provide you with data and leads that you can review, analyze, and export.
“Keyword Tool” is a premium alternative to the Google Keyword planner that allows you to find relevant long-tail keywords for any of your campaigns. The best part is that it offers you dedicated keyword research for YouTube, Bing, Amazon, eBay, and Instagram.
“Ahrefs” is a marketing research tool that will let you track and analyze backlinks from a database of more than 16 trillion backlinks! This will help you to research competitors and monitor your niche in detail so you can learn the best backlink practices to grow your online presence.
“SpyFu” is a marketing monitoring tool that will help you to research the most profitable keywords and ads used by your competitors. With SpyFu you’ll be able to scan a domain to uncover the secret marketing formula of the most successful brands in your niche, including their keyword rankings, their best-performing ad variations, and every keyword they’ve bought on Google Ads!
“Siteliner” is a website auditing tool that will help you improve your website. With Siteliner you’ll be able to identify issues affecting your SEO, your rankings, authority, and site relevance, such as duplicate content and broken links.
“SEMrush” as an all-in-one internet marketing solution that will help you to stay on top of results with powerful SEO, paid traffic, social media, content marketing, and research tools. With SEMrush you’ll be able to get insights about the strategies of your competitors, to find top-performing keywords, and to analyze links in deep detail.
“Infusionsoft” is a powerful internet marketing automation tool that will save you a lot of time. With Infusionsoft you’ll be able to automate and customize processes such as sales, marketing, and others according to the needs of your business.
“Visage” is a visual content creation tool that will enable you to develop professional, brand-centric graphics to represent your business. With Visage you’ll be able to keep brand consistency with a reference guide, to produce high-quality visuals on the fly with a drag-and-drop editor, to insert live links into your graphics, and to send your graphics to your favorite content management systems on autopilot.
Chapter 19: Complete Internet Marketing Shocking Case Studies in 2019-20
“Steinway Pianos” is an American piano company popular for manufacturing and selling high-quality, world class pianos.
Objective: The company’s objective was to generate more conversions, to attract new customers, and to drive more sales.
Strategy: The company ran a series of email marketing campaigns targeted at clients from a list collected from the company’s website.
Results: The company generated a 48% increase in new users, decreased bounce rates by almost 15%, and increased their conversion rate by a whopping 629%!
“Wholesale Marine” is an online retailer that specializes in quality boating products.
Objective: The retailer’s objective was to increase organic reach, market share, and revenue.
Strategy: The retailer got its website audited, fixed a series of errors that were limiting its organic reach, and optimized all content for search engines.
Results: The retailer achieved higher keyword rankings, increased organic reach by 66%, and increased revenue generated by organic traffic by 190%!
“Light Impressions” is a multi-million dollar archival supplies retailer.
Objective: The retailer’s objective was to lower cost-per-acquisition and improve its organic reach.
Strategy: The retailer optimized its website with search-engine friendly content and code, enhanced its call-to-action and user experience, and implemented on-page search engine elements.
Results: The retailer now ranks in the top ten of Google search results in its niche, even outranking amazon for product searches. Traffic from non-branded searches increased to 10,000 visitors a month and is converting at 2%!
“Weisman Home Outlets” is a leading supplier of discounted kitchen cabinets and bathroom finish products.
Objective: The supplier’s objective was to build an email database and increase return on investment.
Strategy: The company added a sign up form to their website offering free home measuring services and large discounts.
Results: The email campaign generated $38,000 in sales during its first month and increased open rates by 15%!
“Invite Health” is a company that sells high-end vitamins and supplements.
Objective: The company wanted to transition from being a brick-and-mortar store to developing and growing an online business.
Strategy: The company created an eCommerce website where it implemented search engine optimization and content marketing strategies. It also developed an email marketing campaign to generate online leads.
Results: The company was able to generate a revenue boost of 46%, a boost in transactions of 47%, and a 58% boost in traffic in its first two years!
“Hobie Polarized” is a lifestyle company that sells trendy outdoor eyewear.
Objective: The company wanted to enhance its website experience to attract more qualified visitors.
Strategy: The company improved on-site search engine optimizations, site navigation, and design. It also implemented email marketing and paid search ads into its marketing plan.
Results: The company was able to increase revenue by 244% and to boost average order value!
“EDP Dental” is the leading dental plan company in the New York City area.
Objective: The company wanted to increase website traffic and the amount of conversions on its website.
Strategy: The company implemented a number of optimizations on its sites, including new content that incorporated target keywords to boost site ranking, enhanced CTA placement, and social follow buttons.
Results: The company was able to attract new customers, increase spending, and generated 495 new leads in the first six months!
“Road Cases USA” is an American manufacturer of musical instruments, lighting equipment, and travel cases.
Objective: The company wanted to increase their overall sales.
Strategy: The company optimized their website design and SEO to reach more organic leads, and implemented pay-per-click advertising strategies into its marketing plan.
Results: The company was able to increase organic traffic by 14%, its numbers of orders coming from ads to its website by 26%, and revenue by 25%!
“Jennings Heating And Cooling” is a company that provides heating, ventilation, and air conditioning services.
Objective: The company wanted to increase sales, achieve higher search rankings, and generate more leads from organic traffic.
Strategy: The company implemented several search engine optimizations on its website, such as adding buying intent keywords into the website’s content.
Results: The company was able to increase its number of new and repeat customers, as well as to increase total average website visits by 54%!
“ForeverLawn” is a premier artificial and synthetic grass manufacturer.
Objective: The company wanted to reach more potential customers and leads on the internet.
Strategy: The company started targeting local customers by implementing geo-targeted search engine optimizations on landing pages full of buyer-intent keywords.
Results: The company was able to grow organic traffic by 25%, and to increase conversions from organic search users by 28%!
Chapter 20: Complete Internet Marketing Frequently Asked Questions in 2019-20

Is Every Strategy Used In Complete Internet Marketing Relevant For Your Business?
Every strategy used in complete internet marketing is intended to help you achieve specific business goals, and best of all, a complete internet marketing plan like the one we’re giving you in this course is designed to make all strategies involved work together.
For example, website optimization will help you to position your site on top of search results, content marketing will help you to attract relevant traffic to your site, and email marketing will help you to capture the contact info of the audience that comes to your site.
Should You Run Your Own Complete Internet Marketing Campaigns? Or Should You Get Help From An Agency?
You can run complete internet marketing campaigns on your own as long as you know what you’re doing. In this course, we’re providing you with a complete internet marketing blueprint that’s proven and easy to implement. All you need is to follow the step-by-step lessons to the letter, in the order given, and you’ll get results.
However, we do advise you to get help with certain tasks, such as with managing your social media channels, so you can better focus on the business aspects of your campaigns!
What Is A Common Mistake When Trying To Implement Complete Internet Marketing Strategies?
The most common mistake is creating content that is brand-centric. Brand-centric content is content that focuses too much on the brand, or on product features.
When creating a campaign to promote a brand or the benefits of a product, the best approach is to focus on how the brand can service its target audience, or how a product can solve problems faced by customers in a specific niche.
This doesn’t mean that you can’t create branded content, it just has to focus on the human side of the business, such as about the maker of the product, or the voice behind a brand.
How Soon Can You Expect To Monetize A Complete Internet Marketing Campaign?
It depends on how long it takes to get leads from considering buying your product to actually buying your product. This is harder to achieve when you are doing business in a niche with high competition, and it is easier to achieve when you do business in a niche with an audience that is always ready to buy.
Is It Really Necessary To Maintain A Blog If You Are Already Creating Content In Other Formats?
Unless you do business as an entertainer and you focus on a single format, like if you are a YouTuber, or a streamer, then yes, maintaining a blog is crucial.
This is because a blog can help you to attract people at any stage of the sales funnel. Remember, people who are searching products to make a final purchasing decision look for relevant info by entering product keywords on a search engine. Those searches are going to funnel potential customers to your blog, where they might decide to buy your products.
Likewise, a person just looking for content in your niche can land on your blog and convert into a repeat visitor, then he might subscribe to your mailing list, then he will finally convert into a customer. In short, maintaining a blog is a powerful, cost-effective strategy that you need to implement.
How Important Is Marketing Automation?
Marketing automation is becoming increasingly important because it can help you to streamline a lot of marketing processes that are time consuming, including lead generation, nurturing, and scoring, audience segmentation, and others.
Are Internet Marketing Tools Driven By Artificial Intelligence Legitimate? If So, Are They A Good Fit For Your Complete Internet Marketing Campaigns?
Internet marketing tools driven by AI are legitimate and they work because they’re designed to help you to make better decisions because they read the data you collect from your campaigns in a certain way and give you insights based on years of marketing experience. The problem is that many companies use the term “AI” as a buzzword to promote their products.
A good AI-driven marketing tool can analyze the sentiment expressed by your audience to help you pick the best topics and voice your content.
What Is One Overlooked Aspect Of Complete Internet Marketing That Marketers Should Be Paying More Attention To?
Conversion rate optimization, the process of optimizing your conversion strategies across all your marketing channels to increase conversions and sales, is a process that should be implemented right after one has achieved, even exceeded, a campaign’s goal.
What Aspect Of A Complete Internet Marketing Strategy Should You Hand To A Professional Once Your Business Becomes Profitable?
You should hire a professional copywriter as soon as you can afford one. Having a professional write your copy is more important than ever because it can help you stand out in saturated niches, to build a better brand, to connect more with the segment of your audience, and to inspire more action.
What Key Performance Indicators Should You Measure To Determine Your Success In The Future?
The metrics that will help you to predict what type of optimizations you should implement to improve your results in future campaigns include:
“Total Visits”, or the number of visits that you get to all your relevant channels, including your social media profiles and your best-performing landing pages.
“New Sessions” or “New Visitors”, or the number of new visitors that you’re getting on your main content channels. This one will help you to understand how good your content is at attracting new visitors and encouraging repeat visits.
“Bounce Rates”, or the percentage of visitors that leave your site without exploring it further.
“Total Conversions”, or the number of conversions that happen across your channels. A high number of total conversions will help you understand the efficacy of your current strategies.
Conclusion:
We’re thrilled that you have chosen to take advantage of our Training Guide, and we wish you amazing success.
And in order to take your Internet Marketing Efforts even farther, we invite you to get the most out of it by getting access to our Step by Step Video Training clicking here
Thanks so much for the time you have dedicated to learning how to get the most advantages from Internet Marketing for 2019-20.
Internet Marketing have come to stay in the market forever.
To Your Success,
Videos
Tools & Services
Training Courses
https://www.udemy.com/learn-digital-marketing-course/
https://digitalmarketinginstitute.com/students/courses/professional-diploma-in-digital-marketing
Blogs
https://www.searchenginejournal.com/internet-marketing/230047/#close
https://www.oberlo.com/blog/beginners-guide-7-types-internet-marketing
Forums
https://www.quora.com/What-is-the-best-online-marketing-forum
Affiliate Programs
https://makeawebsitehub.com/affiliate-marketing-networks/
Webinars
https://www.freewebinarwednesdays.com/internet-marketing/
Infographics
https://blog.hubspot.com/marketing/state-of-content-marketing-infographic
Case Studies
https://www.wordstream.com/blog/ws/2011/09/29/marketing-case-studies
Facts