I’ll be guiding you on creating your Info Product that sells (even if it’s your first one) – step by step. Firstly, open your Word Program.
The following is the chronological order of how you should write and organize your Information Product that sells.
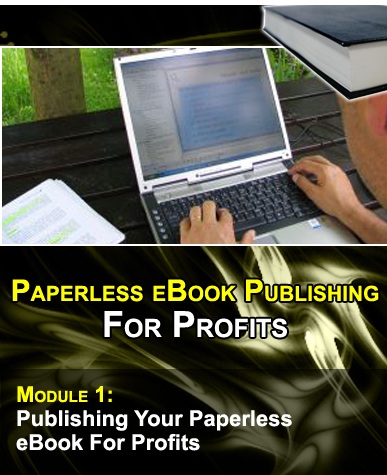
Product Cover
Always, always – and always – start your first page with a cover. I am constantly amazed at the number of writers and Info Product authors who create their products without a cover.
Are they from another planet? I don’t think I’ll ever find out.
But on my planet, we always start our product creation with a cover. We give our “new-born-profit-maker” a face. Care to come to my planet?
You’ve read this far and there’s no way you could miss seeing my product cover earlier, in print or not.
Front Cover
It could be just as good for you if you have and know how to use this powerful Paint program, too, to design your own product cover.
So, if you know how to design your own cover professionally, do just that and paste it into the first page of your Information Product in Word format, like below:
Designer Tips: You can easily source for good, copyright-free images for free and use them in your covers, just as I use them for mine.
I frequently use http://www.sxc.hu/ and http://www.photobucket.com/ and I am very much pleased with their wealth of copyright-free images and photos. You will be interested in using them, too.
Two other great sources you may want to check is:
High Quality Graphics Templates Packs
But if you do not know how to design your own graphic cover well, you can:
- Use whatever skill you have to create your own cover within the Word Program environment. It can consist of fancy-styled titles, wordings, boxes, and more. (See example in the next page)
- Alternatively, if you have the money to spare, you can engage a graphic designer to do the work for you.
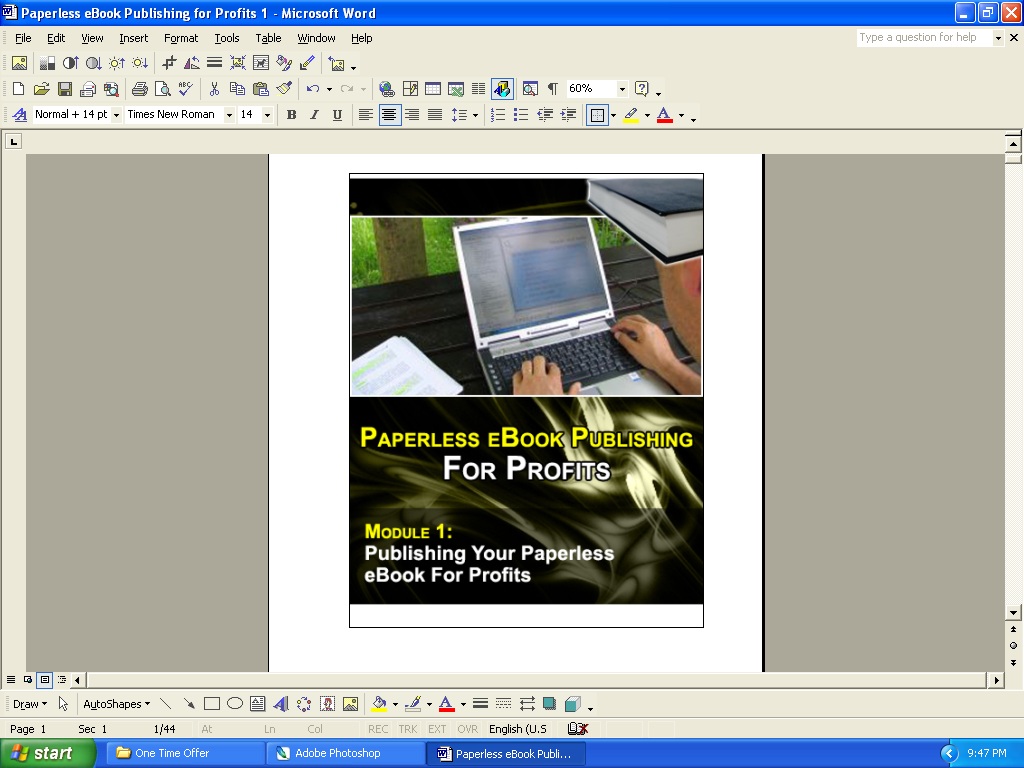
Example cover designed in Word environment
Usually, the graphic designer you hire to create the cover for you also designs the product image for it (also known as “E-Cover”).
Here are examples of an E-Cover:
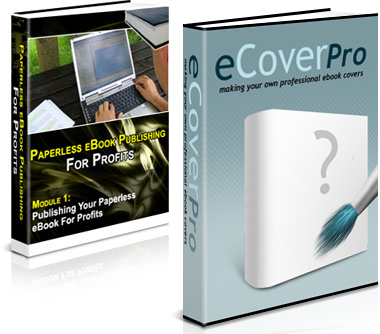
If you aren’t keen on hiring a graphic designer to create the E-Cover for you, you can still create your own one automatically with software from ecoversoftwarepro.com.
The importance of a good E-Cover in your sales letter will be covered in detail in Module #2 of this series.
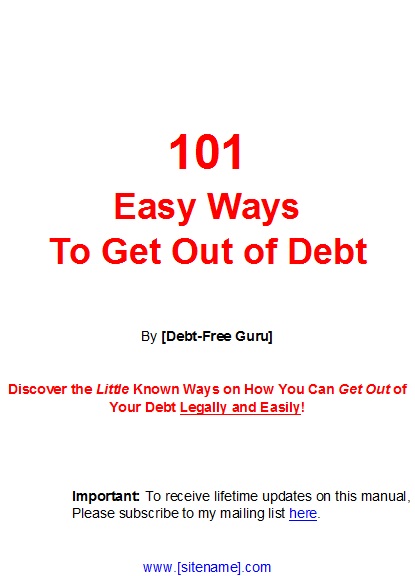
Important Notices
On the second page of your E-Book is where you should state your copyright, legal and/or guarantee notices (simply refer to Page 2 of this manual for an example of how your copyright/legal/guarantee notice can be written).
A very important thing to note to your reader on the same page (or the next) is that if your reader has any form of Resell Rights or Give Away Rights to your product.
Again, if you would read the second page of this manual:
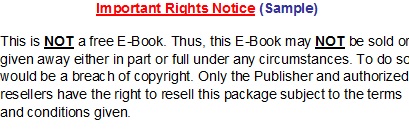
So, if you have decided that you are the only one to sell your own product and not convey any form of Resell Rights, you may write your rights notice like below:
This E-Book cannot be sold or given away or free. Only the Publisher has the right to sell this product (package).
If you are also going to sell the Basic Resell Rights to a limited number of resellers, then you may write your rights notice like the following:
Only the Publisher and his authorized resellers have the right to resell this product (package).
If you are conveying Master Resell Rights to your product, which means anyone who has the product can choose to resell the product and keep all the profits:
You now have Master Resell Rights to this product. You may resell this product at $20.00 (suggested price) and keep all the profits.
This product cannot be given away for free. However, this product can be added to a paid membership site, bundled into a paid package, or be given away as a bonus to another product you are selling.
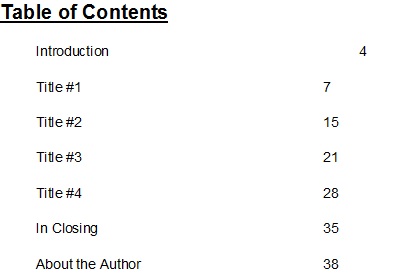
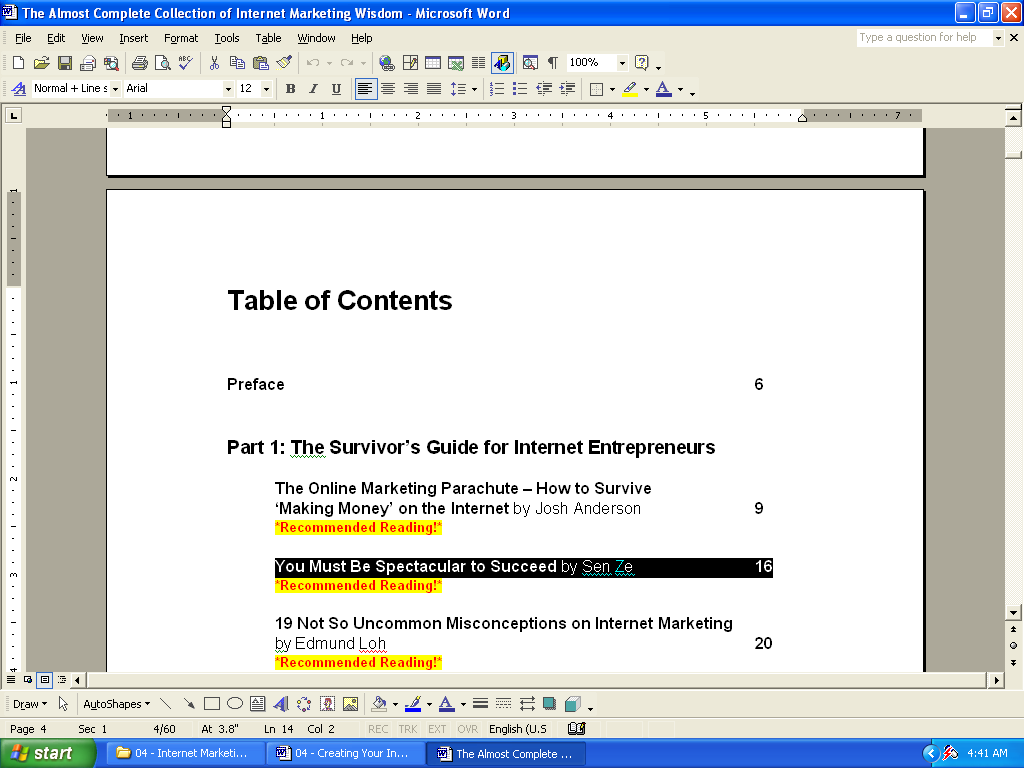
Table of Contents
Now, here’s what usually follows your notices – your table of contents.
You want to have your reader get a sneak peak at your product’s contents at a glance – all in one page/section.
Your table of contents can be formatted like the following:
Tip: If your product has several topics and pages, you can give your readers a lot of reading convenience (if they are reading on the computer) by hyper-linking your topics in the table of contents.
This way, your reader only has to click on a chosen topic in the table of contents to get to the page rather than scroll down to its page, especially if it’s in the 100-200 page range.
Here’s how you can hyper-link the topics in your table of contents, step-by-step:
1. Compile your product in full.
2. Starting with the first chapter, you need to put your cursor blink in front of the topic’s title. Insert bookmark and give the bookmark a name, say, ‘1stchapter’.
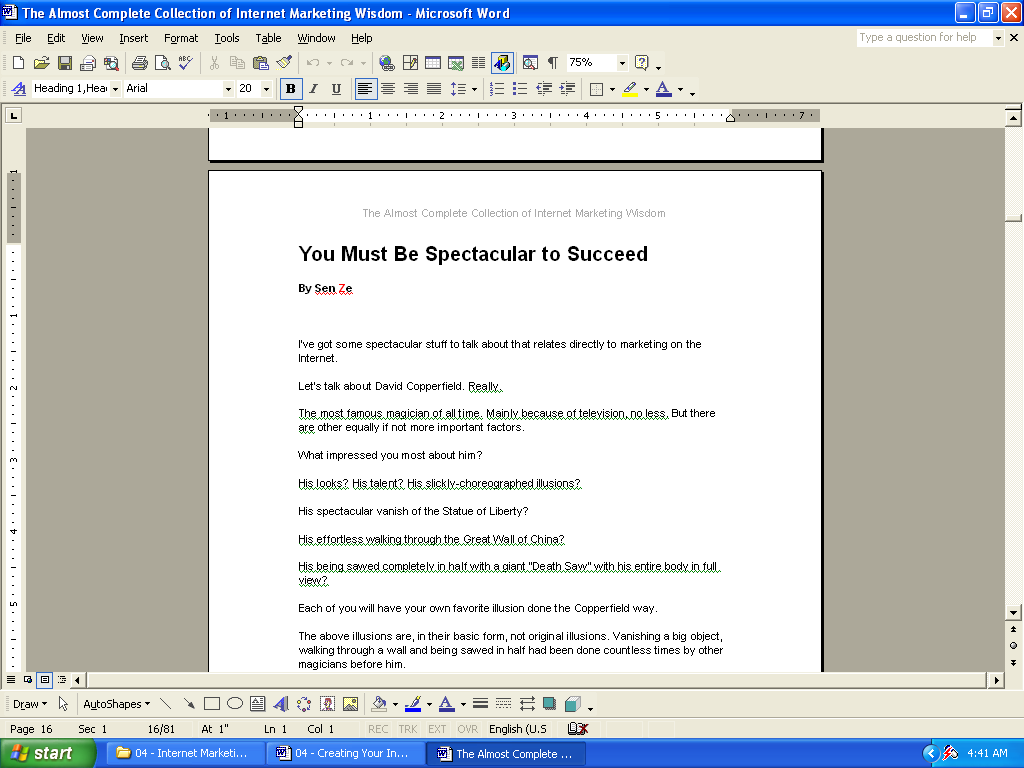
3. Go to your “Table of Contents” page and highlight the entire line of the topic indicated with your cursor (in this case, the first chapter of your product).
4. And then, right-click on the text (or CTRL-K in short). A drop-down menu will appear, and select “Hyperlink”. Another window appears.
5. On your left hand of the menu, select “Place in the Document”.

Select the name of the bookmark (‘1stchapter’ in the example), and click OK.
6. The link is now associated. Notice the link has changed to blue and is now clickable when you do a CTRL-click action on it and it will bring you to the page where you bookmarked earlier.
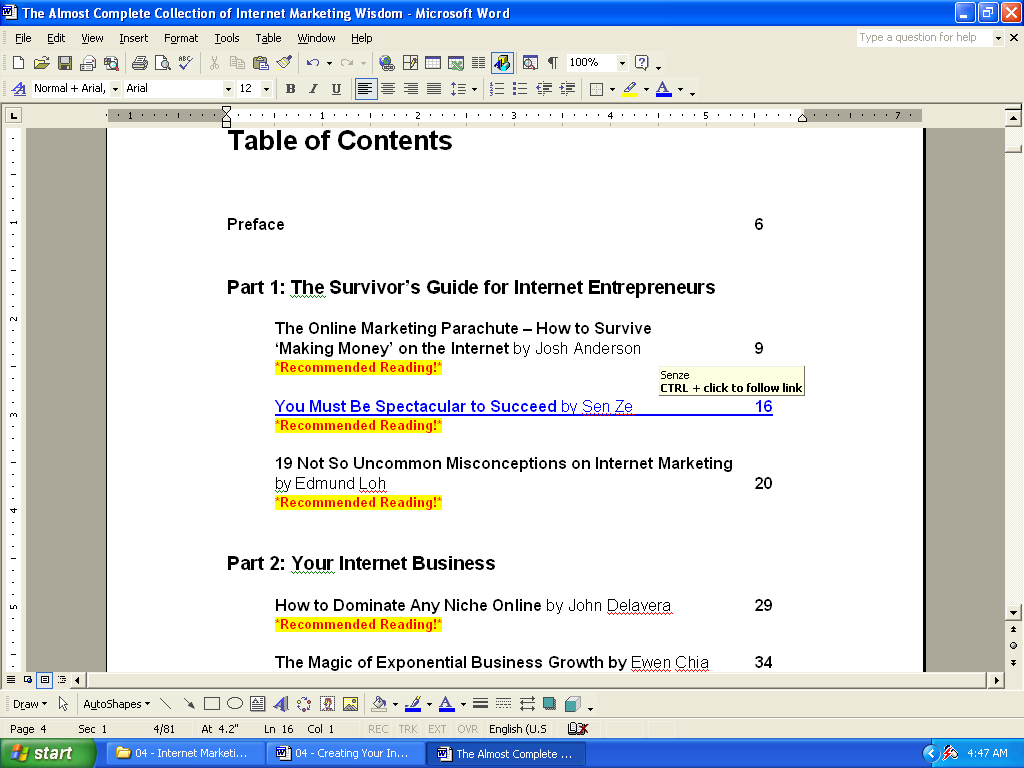
In order to remove the underline style, highlight the text and click CTRL-U. To change the color of the text to black or any other colors of your choice, simply highlight the text and change using your Font Color function (see below your MS Word program).
Finally, your reader can now jump around at every parts of your Info Product simply by you enabling them to click on the topic links in the table of contents to get him there!
Page Layout
One word of advice: always keep your page layout WHITE! You’re not offering a Power Point presentation for sale. Instead, you should be taking into consideration about how much ink your reader will need to print your product out.
Some of your readers are probably treasuring the amount of ink they have left in their cartridge box. Thus, make sure when they have to “spend” their ink, it’d be worth every dot.
One way is to just keep your page layout white (like what you’re reading on now). No black, no red, and no pictures of an expensive car.
After all, people purchase E-Books for information, not for the sake of seeing expensive cars in the background overlaid by text.
And about your page size, I’ve said it earlier but it bears repeating: keep it letter-sized. You already know why, if you’ve been following me up until now.
Now, let’s talk about your page header and footer (the one at the top and bottom of your page).
You can easily create your own header and footer by going to View -> Header and Footer.
You want to create another form of branding here as well.
Since it is very likely that your reader will print out your Info Product to read, you may want to include your name, product title, and even your web site URL in every page’s header and footer, such as what you’re seeing on this page now.
(I told you that you’re looking at the best Info Product example?)
Contents
Now, here comes the heart of the product – content!
Regardless of what type of information you will be dispensing in your paid E-Book, it must the following criteria:
- Saves time,
- Saves money,
- Saves effort,
- Makes money (optional),
- Solves problems, and
- Gives benefits.
As you can see, without one or more of the above requirements, your information wouldn’t amount to quality worth paying for.
Examples:
- “How to Play Golf Professionally in 13 Days”
Isn’t $30.00 worth paying for since the information within this manual can help you achieve professional peak in 13 days? Or would you rather take forever?
- “How to Make Money Online”
For only $97.00, you can now make money online. Or would you rather save $97.00 and make mistakes that amount more than that?
- “How to Prevent Your Divorce”
Is $67.00 too much to ask from your wallet or do you prefer to let go of your spouse and pay at least 50% in assets after the divorce is granted by the court?
Here are ways you can compile quality, in-demand content, paid or free:
1. Write on Your Own
Personally, this is my best preferred way of creating content, though I can’t possibly say that this is for everyone, too.
Creative people often say that it’s a way to show how much you know or what an expert you are in a certain field, but I prefer to sum it up as, “I didn’t waste my last 20 years of my life.”
Writing your own content gives you more authority over your own content alongside with giving your own insights, expert opinions and recommendations, which can be more powerful than any other methods of content creation.
Writing own content can be a fear for others, somehow, and they often hide behind the excuse that “they don’t know much”.
If you are one of them, I’d like to remind you that you’re probably looking down on yourself, or that you are, in a way, saying, “I wasn’t really doing anything productive for my last lifetime.”
In short, writing on your own also requires self-esteem in your vast wealth of knowledge. The downside, though, is that this method requires a lot of time and effort on your part, not just the expertise and ability to write well.
2. Interview
Now, if you are truly exploring a market where you know nothing of other than the fact it IS profitable, here’s one sure fire way: interview an expert!
Whether you’ve been living a life of “jack of all trades” or know nothing about that market, interviewing an expert on the subject not only saves you from grave danger of knowing nothing, but you can have your content churned out by someone else more capable.
It can be done free, in most cases! It need not be someone who goes online. In fact, you can interview a friend or someone you know who is an expert in a field where people are willing to pay (or even die for, in extreme cases).
Your product’s value can be tremendously added if you can get the interviewee to transcribe his or her information in audio format as well as text (transcript).
3.Hire a Ghost Writer
This one requires you to invest your sum of money, but you get to save your other valuable assets: time and effort.
If you are horrible at writing, don’t know the topic well enough to write it for sale and know no one to be an expert in it, this can be your best method in churning out quality content.
A ghost writer, in a nutshell, is someone who does the writing without taking any credit. Obviously, it’s nothing to do with the ghosts you’re probably thinking of right now.
You can go to eLance.com, bid and engage a ghostwriter of your choice. You can get one or more ghostwriters to write the content for you in several articles. The last time I recall, you can get one to write a 300-400 word article at $5.00 each.
It’s up to the ghostwriters to do the research on the topic.
Once you have them written the contents in many articles, you can proof-read them, edit, and later compile them into a paid Info Product for sale.
4. Public Domain
If you’re not familiar with the term “public domain” allow me to help give you at least a general idea of the legal and business power contained in these two words.
At a very basic level, “public domain” means “anything that is NOT protected under US copyright law”.
This includes ALL works published before 1923 and, under certain conditions, works published up to 1978.
A ‘work’ can be anything: a book, a play, music, photographs, movies, instruction manuals, courses, reports, posters, and more.
Of course, we’re now referring to books, courses, reports, and manuals for this purpose.
Republishing and repackaging public domain information and other creative works can make you a lot of money other than saving you time from writing your own quality content.
The reason is fairly simple: If you find, re-package and sell information that has fallen into the public domain, you don’t have to pay royalties or copyright fees on that work.
If you love the idea of publishing information as a business model but you don’t want to or can’t create your own book or manual, this method is for you.
Not every kind of work in the public domain will have a market but here are some examples of books you could be republishing that have an excellent market demand right now:
- Mind reading
- Marketing
- Advertising
- Copywriting
- Trading stocks and commodities
- Hobbies
- Arts
- Crafts
- Herb remedies
- Natural healing
- Children stories etc.
A Word on Free Articles
As you can see, compiling free articles didn’t make the list. For one, they don’t represent quality information, as usually the purpose of articles is introducing the surface of a certain topic.
Secondly, if you would study the reprint right terms and conditions for article directories such as eZinearticles.com, you will learn that you are not allowed to compile any one article for sale, even if you credit the author by republishing his or her resource box.
